
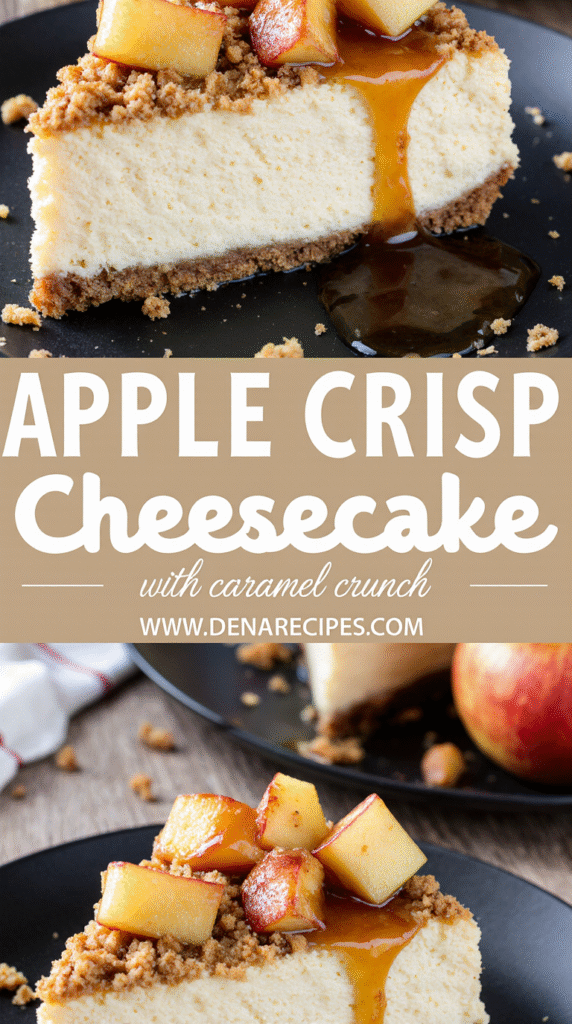
The Secret to Perfect Apple Crisp Cheesecake with Caramel Crunch: A Foolproof Guide
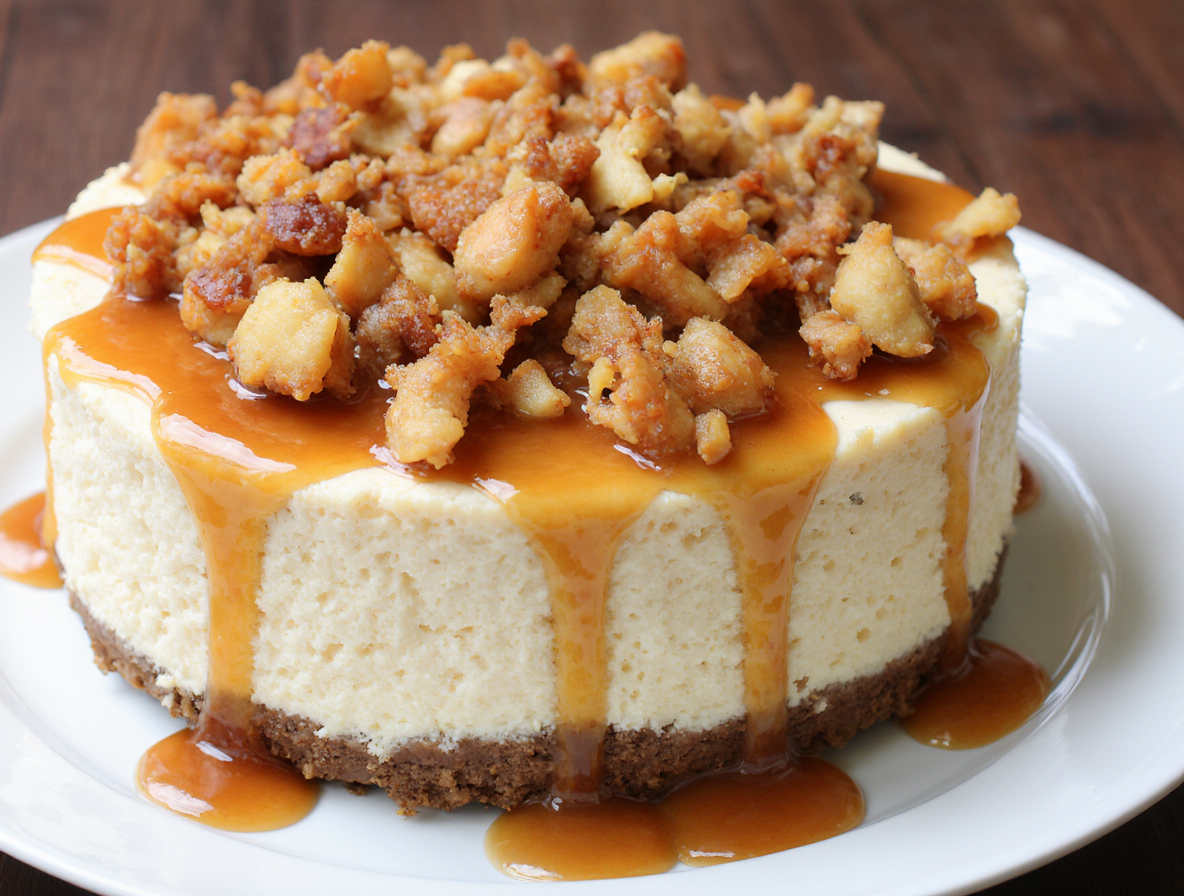
Apple crisp cheesecake with caramel crunch captures the essence of fall in every decadent bite. This incredible dessert combines two classic favorites – the comforting warmth of apple crisp and the luxurious creaminess of New York cheesecake. When autumn arrives, I immediately think of colorful leaves, cozy sweaters, and crisp air – all feelings this dessert embodies perfectly.
What makes this cheesecake apple crisp truly special is how each element works in harmony. The buttery graham cracker or cookie crust provides a satisfying foundation, while the extremely smooth and creamy cheesecake layer melts in your mouth. Above all, the caramel apple crisp recipe adds layers of cinnamon-spiced apples and a buttery oat crumble that create an irresistible contrast of textures. Additionally, the finishing touch of salted caramel sauce transforms this caramel crunch cheesecake into the ultimate fall indulgence.
In this foolproof guide, I’ll walk you through every step of creating this showstopping apple crisp cheesecake recipe. From selecting the perfect ingredients to mastering the baking process, you’ll learn all the secrets to achieve dessert perfection. However, be prepared to plan ahead – this masterpiece needs to chill for at least 6 hours before serving, but I promise the wait is absolutely worth it.
Choosing the Right Ingredients for Apple Crisp Cheesecake
The quality of ingredients makes all the difference between an ordinary cheesecake and an extraordinary apple crisp cheesecake with caramel crunch. Let’s explore the key components that will elevate your dessert to bakery-worthy status.
Best apples for baking: tart vs sweet
For depth of flavor in your cheesecake apple crisp, using a combination of tart and sweet apples creates the perfect balance. Granny Smith stands as the best overall baking apple due to its firm texture and tartness. For tart varieties, consider Braeburn, Jonathan, or Cortland. Among sweet options, Honeycrisp, Pink Lady, Jazz, and Fuji excel in baking applications.
The ideal approach? Use equal parts tart and sweet apples—if your recipe calls for four apples, use two tart and two sweet varieties. This strategy provides interesting depth of flavor that a single variety cannot achieve.
Cream cheese types and why it matters
For a perfect cheesecake, brick-style cream cheese is non-negotiable. This full-fat, plain (unflavored) variety produces the rich, creamy texture essential for an exceptional apple crisp cheesecake recipe. Furthermore, room temperature cream cheese blends smoothly without lumps.
Never substitute whipped or tub-style cream cheese in your recipe. These contain added air and stabilizers that can lead to a grainy texture and watery cheesecake. The science is clear—the extra air in whipped cream cheese dissipates during baking, ruining your dessert’s texture.
Crust options: graham crackers, cookies, or oats
Graham cracker crusts offer the classic foundation for cheesecake, yet several alternatives can enhance your caramel apple crisp creation. Consider these options:
- Crisp cookies: Speculoos or gingersnaps provide a spicy kick perfect for fall flavors
- Animal crackers or vanilla wafers: Offer subtle sweetness
- Oatmeal crust: Creates a rustic texture that complements the apple crisp topping
Mix your chosen base with melted butter and a touch of sugar, then press firmly into your springform pan.
Caramel sauce: homemade or store-bought?
Homemade caramel sauce requires only three ingredients—sugar, butter, and heavy whipping cream—and takes just 10 minutes to prepare. The flavor vastly surpasses store-bought versions that often taste artificially sweet.
If opting for store-bought, choose a thick caramel sauce rather than a thin dipping sauce. Alternatively, dulce de leche makes an excellent substitute. Regardless of which you choose, a drizzle of caramel brings your apple crisp cheesecake with caramel crunch to perfection.
Step-by-Step Layers: Building the Perfect Cheesecake
Building the perfect apple crisp cheesecake with caramel crunch requires patience and attention to detail. Each layer contributes to the harmonious blend of flavors and textures that make this dessert extraordinary.
1. Making the graham cracker crust
The foundation of any magnificent cheesecake starts with a properly prepared crust. First, wrap your springform pan with heavy-duty aluminum foil to protect it from water during baking. Next, spray the pan with non-stick spray or butter to prevent sticking.
Combine about 12 full graham cracker sheets (yielding 1½ cups of crumbs), ¼ cup sugar, and 6 tablespoons of melted butter until evenly moistened. For enhanced flavor, consider using brown sugar instead of granulated sugar. Press this mixture firmly into your pan using the bottom of a measuring cup, extending slightly up the sides.
Pre-bake the crust at 350°F for 8-10 minutes until golden and dry. This critical step ensures a crunchy foundation that won’t become soggy.
2. Preparing the creamy cheesecake filling
In a large bowl, beat room temperature cream cheese until smooth and fluffy. Gradually add sugar, mixing at medium speed until well combined, being careful not to overmix. Subsequently, incorporate sour cream and vanilla extract until just combined.
Finally, add eggs one at a time, mixing on low speed after each addition. Overmixing introduces air bubbles that can cause cracking. For added richness, include a touch of caramel sauce directly in the batter.
3. Slicing and seasoning the apples
Peel and core your apples, then slice them thinly or dice them into uniform pieces. Immediately toss with lemon juice to prevent browning. Mix the apples with brown sugar, cinnamon, and occasionally nutmeg for that classic apple crisp flavor.
Some recipes recommend cooking the apples briefly before adding them to the cheesecake, specifically 6-7 minutes until soft but not mushy.
4. Mixing the oat crumble topping
In a medium bowl, combine oats, brown sugar, flour, and cinnamon. Pour melted butter over this mixture and stir until evenly moistened. The texture should be crumbly yet able to stick together when squeezed in your palm.
For easier slicing after baking, consider using quick oats rather than old-fashioned oats, as they create smaller crumbles.
Baking and Cooling: Avoiding Common Mistakes
Mastering the technical side of baking is essential for creating a flawless apple crisp cheesecake with caramel crunch. Avoiding common pitfalls during baking and cooling will ensure your masterpiece achieves the perfect texture and presentation.
Water bath vs no water bath
A water bath creates a humid environment that helps your cheesecake apple crisp bake evenly without drying out. Primarily, this method protects the egg-heavy mixture from harsh heat, allowing it to rise slowly and evenly. To set up a traditional water bath, wrap your springform pan in heavy-duty aluminum foil (at least three layers) to prevent leaks, place it in a larger roasting pan, and add hot water about halfway up the sides. Alternatively, place a roasting pan with boiling water on the bottom rack while your cheesecake bakes on the center rack. This creates steam without risking water seepage into your cake.
How to know when it’s done
The classic “jiggle test” remains the most reliable method for determining doneness. Your caramel apple crisp cheesecake is ready when the outer 2-3 inches appear set while the center still jiggles like Jell-O. For absolute certainty, use an instant-read thermometer—the internal temperature should reach 150°F in the center. Consequently, resist the temptation to bake until completely set, as this leads to dryness and cracking.
Cooling and chilling for best texture
Gradual cooling is crucial for cheesecake texture. Turn off the oven, crack the door open, and leave your cheesecake inside for about an hour. Thereafter, allow it to cool completely at room temperature before refrigerating. Chill for at least 6-8 hours—overnight is preferable. This lengthy process transforms your apple caramel crisp cheesecake from a custardy texture into that velvety, creamy consistency we expect.
Preventing cracks and soggy crust
Cracks typically result from three factors: overmixing the batter, overbaking, or rapid temperature changes. To prevent a soggy crust with your caramel crunch cheesecake, pre-bake the crust for 10-12 minutes at 350°F. Given the moisture from apples, cook them briefly with sugar and spices, then drain any liquid before adding them to your cheesecake. Run a knife around the edge after baking to prevent the cake from sticking and cracking as it cools.
Serving and Storing Your Caramel Crunch Cheesecake
After perfecting your apple crisp cheesecake with caramel crunch, proper serving and storage techniques ensure every slice delivers maximum enjoyment. Indeed, these final steps are just as crucial as the baking process itself.
How to slice cleanly
For picture-perfect slices of your cheesecake apple crisp, start with a properly chilled cake. The hot knife method works wonderfully – dip a sharp, thin knife in hot water, wipe it dry, then slice from the edge toward the center in one smooth motion. Clean and reheat your knife between each cut to prevent crumbs from sticking.
Alternatively, unflavored dental floss or piano wire creates remarkably clean cuts. Simply wrap the ends around your thumbs and pull down firmly through the filling and crust. This technique works particularly well with creamy cheesecakes that might stick to traditional knives.
Topping ideas: caramel drizzle, whipped cream, ice cream
Your caramel crunch cheesecake truly shines with thoughtful toppings. A generous drizzle of caramel sauce transforms each slice into a show-stopping dessert. If your caramel has thickened, warm it in the microwave for about 30 seconds before drizzling.
Consider these delicious accompaniments:
- A dollop of freshly whipped cream
- A scoop of vanilla ice cream for temperature contrast
- Extra caramel sauce served on the side
Storage tips: fridge vs freezer
Store your apple crisp cheesecake recipe in an airtight container in the refrigerator for 3-5 days. For longer preservation, freezing is an excellent option, extending shelf life up to 2-3 months.
When freezing, you have two approaches: freeze the whole cheesecake or individual slices. For slices, wrap each piece tightly in plastic wrap before placing in an airtight container. For the entire cake, wrap it thoroughly in plastic wrap followed by aluminum foil.
Remember that the crumble topping may soften slightly upon defrosting. To minimize this effect, defrost frozen cheesecake gradually in the refrigerator rather than at room temperature.
Make-ahead tips for holidays
The caramel apple crisp recipe makes an ideal make-ahead holiday dessert. Prepare it 2-3 days before your event and refrigerate for peak freshness. For longer planning, you can freeze it up to two months in advance.
When ready to serve, remove the sides of the springform pan after tracing around the edges with a sharp knife. Let frozen cheesecake thaw overnight in the refrigerator. Serve slightly chilled so the caramel maintains its perfect texture.
Conclusion
Apple crisp cheesecake with caramel crunch truly represents the perfect marriage of fall flavors and decadent textures. Throughout this guide, we’ve explored every aspect of creating this showstopping dessert, from selecting the ideal apple varieties to mastering the water bath technique. Each component plays a crucial role in the final result.
Quality ingredients undoubtedly make all the difference. The combination of tart and sweet apples, brick-style cream cheese, and homemade caramel sauce creates layers of flavor that store-bought alternatives simply cannot match. Patience also remains essential throughout the process—particularly during cooling and chilling, which transforms your dessert from good to extraordinary.
The technical aspects might seem challenging at first, especially the water bath and preventing cracks. Still, these careful steps ensure your cheesecake achieves that velvety texture and beautiful presentation that will impress family and friends alike. This dessert actually becomes even more practical for entertaining because you can prepare it days ahead.
My favorite part about this recipe lies in its versatility. You can customize the crust with gingersnaps or vanilla wafers, adjust the spice level, or experiment with different toppings. Though this dessert requires time and attention, the moment your guests take their first bite makes every minute worthwhile.
Fall desserts should comfort and delight, and this apple crisp cheesecake accomplishes both perfectly. The contrast between creamy cheesecake, spiced apples, crunchy topping, and smooth caramel creates a dessert experience that celebrates the season in every bite. Before long, this recipe will become your signature fall dessert—one that family and friends request year after year.
FAQs
Q1. What type of apples work best for this Apple Crisp Cheesecake? A combination of tart and sweet apples is ideal. Use equal parts of tart apples like Granny Smith or Braeburn, and sweet apples like Honeycrisp or Pink Lady for the best flavor balance.
Q2. Can I make the caramel sauce ahead of time? Yes, you can make homemade caramel sauce in advance. It takes about 10 minutes to prepare and offers superior flavor compared to store-bought versions. Store it in an airtight container in the refrigerator and warm it slightly before using.
Q3. How do I prevent my cheesecake from cracking? To prevent cracks, avoid overmixing the batter, don’t overbake, and cool the cheesecake gradually. Turn off the oven, crack the door open, and leave the cheesecake inside for about an hour before cooling at room temperature.
Q4. How long should I chill the cheesecake before serving? Chill your Apple Crisp Cheesecake for at least 6-8 hours, but overnight is preferable. This extended chilling time is crucial for achieving the perfect creamy texture.
Q5. Can this cheesecake be frozen for later use? Yes, you can freeze the Apple Crisp Cheesecake for up to 2-3 months. Wrap it tightly in plastic wrap followed by aluminum foil. Thaw overnight in the refrigerator before serving for the best texture and flavor.