
The Secret to Juicy Honey Garlic Chicken: Easy One-Pan Recipe
Did you know honey garlic chicken can be prepared in just 12 minutes? That’s right – this mouthwatering dish combines sweet and tangy flavors while being one of the quickest meals you can make on busy weeknights.
I’ve discovered that the secret to this incredible recipe lies in its simplicity. With just 5 ingredients for the honey garlic sauce for chicken, you can transform basic poultry into a restaurant-quality meal. Furthermore, this honey garlic chicken recipe has earned an impressive 4.7 out of 5 rating among home cooks, proving its reliability and deliciousness.
Whether you prefer honey garlic chicken breast or want to try it with juicier thighs, this versatile dish works beautifully either way. Actually, you can adapt the cooking method to fit your schedule – from quick one-pan stovetop cooking to hands-off slow cooker preparation that takes 2-3 hours on high or 4-5 hours on low.
In this easy honey garlic chicken guide, I’ll share all my tips for creating the perfect balance of flavors while keeping your chicken perfectly juicy. Let’s dive into this family favorite that’s simple enough for lunch or dinner and can be paired with everything from rice to fresh vegetables!
Essential Ingredients for Juicy Honey Garlic Chicken
The foundation of any delicious honey garlic chicken begins with selecting the right ingredients. I’ve discovered through multiple test batches that the perfect balance of sweet, savory, and tangy flavors depends entirely on what goes into your pan.
Choosing the right cut: breast vs. thigh
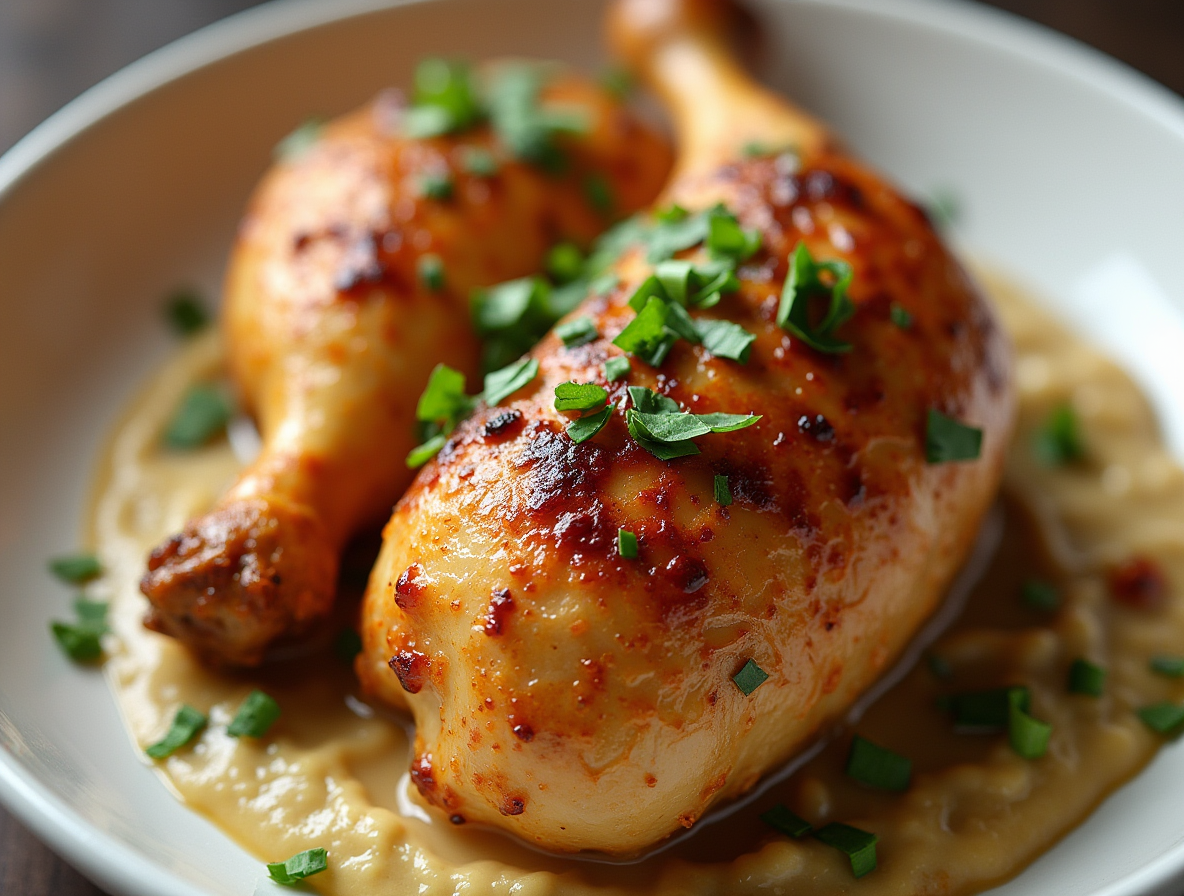
When it comes to choosing chicken for this recipe, you have two excellent options. Chicken breasts are leaner and widely available, making them a popular choice. However, chicken thighs are my personal preference because they’re more flavorful and significantly juicier. The dark meat in thighs adds richness to the final dish and stands up better to high-heat cooking without drying out.
If you’re using chicken breasts, consider slicing them through the center to create thinner pieces that cook more quickly and evenly. For chicken thighs, boneless skinless ones work perfectly, though you can also use bone-in thighs for additional flavor—just adjust your cooking time accordingly.
Pantry staples you already have
The beauty of honey garlic chicken is that its impressive flavor comes from ingredients most of us already have on hand. Here’s what you’ll need for the perfect sauce:
- Honey: Creates the bulk of the sauce and provides sweetness
- Garlic: Fresh minced garlic delivers the best flavor—approximately 2-7 cloves depending on your preference
- Soy sauce: Adds depth and umami flavor while naturally seasoning the dish
- Butter or oil: Adds richness and is used for frying the garlic
- Vinegar: Apple cider vinegar or rice vinegar cuts through the sweetness
Additionally, you’ll need flour or cornstarch to coat the chicken before cooking. This crucial step helps build a crust that allows the sauce to cling to the chicken and creates a naturally thickened glaze.
Optional add-ins for extra flavor
To customize your honey garlic chicken further, consider these flavor-enhancing additions:
For heat lovers, add sriracha, red pepper flakes, or Korean chili paste to give your dish a spicy kick[52]. A sprinkle of sesame seeds provides texture and nutty flavor—toasting them first amplifies this quality.
Fresh herbs like thyme or cilantro can be added during cooking or as a garnish. For brightness, a squeeze of lemon juice complements the sweetness nicely.
If you’re looking to adapt the recipe, brown sugar deepens the sweetness, and a dash of onion powder adds subtle complexity. For those with dietary restrictions, gluten-free soy sauce works perfectly, and maple syrup can substitute for honey.
Prepping the Chicken for Maximum Flavor
Proper preparation transforms ordinary chicken into the star of your honey garlic chicken dish. I’ve found that a few simple techniques make all the difference between dry, flavorless chicken and succulent pieces that perfectly showcase that sticky, sweet sauce.
Why slicing chicken thinly matters
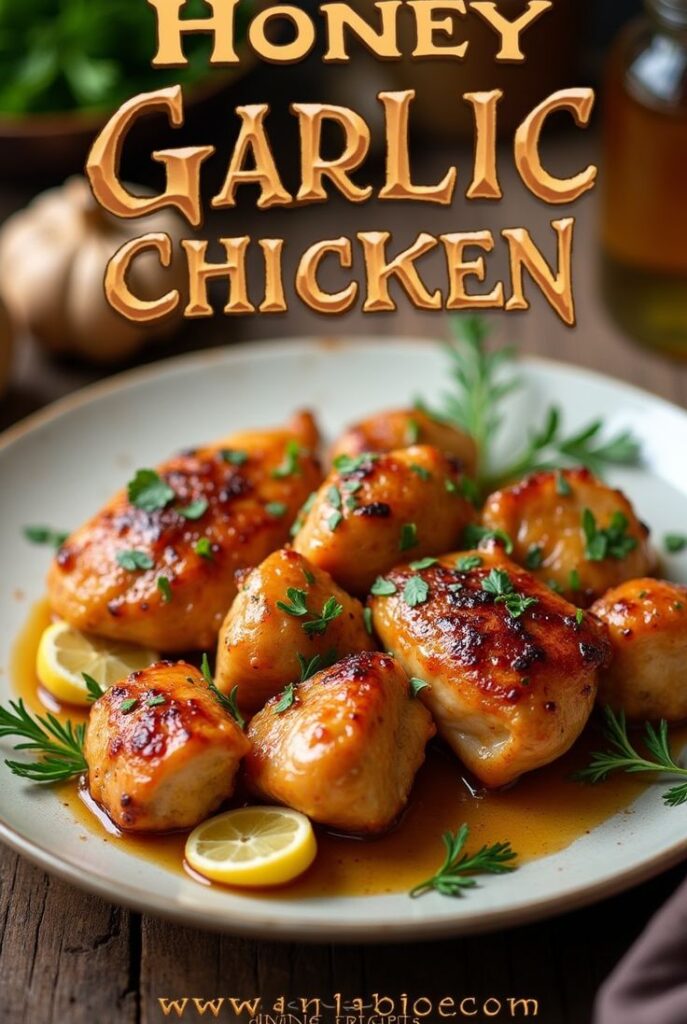
Cutting chicken to the right thickness is essential for juicy, evenly cooked meat. I always slice my chicken breasts in half lengthwise to create thinner cutlets, ideally about ¼ inch thick. This technique serves two crucial purposes: the chicken cooks evenly throughout and retains more moisture.
When chicken pieces are too thick, the outside often burns before the inside cooks completely. Consequently, thin cutlets cook faster while staying tender and juicy. For the best results, I place the chicken flat on a cutting board, hold my knife parallel to the surface, and carefully slice through the center. Alternatively, pound the chicken to an even thickness using a meat mallet.
The role of flour in sauce absorption
Dusting chicken with flour before cooking isn’t just an extra step—it’s a game-changer for honey garlic chicken. The flour creates a light crust that helps the sauce cling beautifully to each piece. Unlike heavily breaded cutlets, this thin coating produces a delicate surface that absorbs the honey garlic sauce exceptionally well.
Moreover, this flour coating locks in moisture while creating that perfect golden exterior. When pan-fried, the floured surface develops a slight crust that becomes the ideal foundation for your sauce to adhere to.
Seasoning tips for balanced taste
Proper seasoning forms the backbone of flavorful honey garlic chicken. Start by patting the chicken dry with paper towels. Subsequently, season both sides with salt and pepper before applying flour. This layered approach ensures flavor penetrates throughout.
For deeper flavor development, consider these techniques:
- Season the flour mixture itself, not just the chicken
- Add garlic powder and paprika to your seasoning mix for complexity
- Pat chicken completely dry before seasoning to help develop a better crust
Ultimately, balanced seasoning creates the perfect canvas for your honey garlic sauce to shine.
Making the Perfect Honey Garlic Sauce
The magic of honey garlic chicken lies in its irresistible sauce. Creating this sweet and savory coating requires understanding a few fundamental components that work together to deliver that perfect sticky glaze.
Core ingredients of the sauce
A truly exceptional honey garlic sauce needs just a handful of ingredients:
- Honey – The star ingredient, providing sweetness and creating that sticky texture we love
- Garlic – Fresh minced garlic (typically 4-6 cloves) delivers the most vibrant flavor
- Soy sauce – Adds depth and umami while naturally seasoning the dish
- Acid component – Rice vinegar or fresh lemon juice balances the sweetness
- Fat base – Butter or oil creates richness and helps carry flavors
Initially, I combine these ingredients in specific proportions—generally ½ cup honey, ¼ cup soy sauce, 2 tablespoons vinegar, and 4 minced garlic cloves for a standard batch.
How to balance sweet, salty, and tangy
Balancing flavors in honey garlic sauce requires careful attention. The sweetness from honey should be complemented—not overwhelmed—by salty soy sauce. Specifically, if your sauce tastes too sweet, adding a splash of vinegar or lemon juice creates harmony.
Alternatively, when a sauce becomes too salty, a touch more honey can counterbalance it. Notably, acid brightens the entire sauce, particularly when added toward the end of cooking.
For an even more complex flavor profile, brown sugar can be incorporated alongside honey, creating deeper caramel notes in your honey garlic chicken recipe.
Tips to thicken the sauce naturally
The ideal honey garlic sauce clings beautifully to chicken rather than pooling on the plate. To achieve this consistency without artificial thickeners:
- Reduction method – Simmer the sauce for 3-5 minutes until it naturally thickens as moisture evaporates
- Cornstarch slurry – Mix 1 tablespoon cornstarch with equal parts water before adding to the sauce
Essentially, when using cornstarch, always create a slurry first to prevent clumping. Allow the sauce to cool slightly before adding the slurry, then return to medium heat until thickened.
Cooking and Serving in One Pan
Bringing together perfectly prepped chicken and your honey garlic sauce happens in a single pan. This practical approach minimizes cleanup besides maximizing flavor development as the chicken and sauce create a delicious harmony.
Step-by-step cooking process
First, heat oil in a large skillet over medium-high heat until shimmering. Once hot, add your floured chicken pieces without overcrowding—work in batches if necessary. Cook undisturbed for 3-5 minutes until golden brown, afterward flip to cook the other side for about 2 minutes.
Next, lower the heat to medium and add butter to the pan. Once melted, add minced garlic and cook for 30-60 seconds until fragrant but not burned. Pour your prepared honey garlic sauce into the skillet, stirring to incorporate any browned bits from the bottom—these contain incredible flavor.
Finally, return all chicken to the pan, allowing it to simmer in the sauce for 4-5 minutes until the sauce thickens naturally and coats the chicken beautifully.
How to avoid overcooking
The biggest mistake with chicken is cooking it too long. For perfectly juicy results, use a meat thermometer to reach 165°F internal temperature. Nevertheless, consider pulling the chicken from heat at 160°F since carry-over cooking will bring it to safe temperature.
Another crucial technique is letting your chicken rest for at least half the cooking time before slicing. Throughout this resting period, juices redistribute within the meat instead of spilling out.
For visual cues, look for firm yet slightly springy chicken that’s no longer pink inside.
Serving suggestions: rice, veggies, or noodles
Honey garlic chicken pairs exceptionally well with:
- Rice options: White rice, brown rice, or cauliflower rice for a low-carb alternative
- Vegetable sides: Steamed broccoli, asparagus, green beans, or Brussels sprouts absorb the sauce wonderfully
- Noodle bases: Egg noodles, rice noodles, or even spaghetti create a complete meal
Consequently, this versatile dish works equally well with Asian-inspired sides or simple steamed vegetables.
Adapting the recipe for other proteins
This honey garlic technique works splendidly with various proteins:
For tofu, use firm varieties cut into 1/4-inch thick “steaks,” lightly coated with flour. Cook until crispy on both sides (about 1 minute per side), meanwhile prepare the sauce separately and combine at the end.
Shrimp requires much less cooking time—just 1 minute on the first side and 30 seconds on the second before adding the sauce ingredients.
Pork chops or cutlets can follow the same process as chicken, albeit with adjusted cooking times depending on thickness.
Conclusion
Honey garlic chicken certainly stands as one of the most rewarding dishes you can add to your weeknight rotation. Throughout my cooking journey, I’ve found this recipe to be foolproof yet impressive, delivering restaurant-quality results with minimal effort. The beauty lies in its perfect balance – sweet honey, aromatic garlic, and savory soy sauce coming together to create something truly special.
After trying numerous variations, I can confidently say that proper preparation makes all the difference. Thinly sliced chicken absorbs flavors better while cooking evenly, therefore ensuring juiciness every time. The light flour coating creates that ideal surface for the sauce to cling to, altogether transforming a simple protein into something extraordinary.
What makes this dish particularly appealing is its adaptability. You can adjust the sweetness, spice level, or cooking method based on your preferences. Undoubtedly, the one-pan approach saves cleanup time without sacrificing flavor development – those caramelized bits from cooking the chicken add incredible depth to the final sauce.
Finally, this recipe offers endless serving possibilities. From classic rice pairings to vegetable sides or noodle bases, honey garlic chicken fits seamlessly into various meal plans. I often make extra sauce to drizzle over sides since it’s irresistibly good. Whether you’re cooking for a family dinner or meal prepping for the week, this dish delivers satisfaction with every bite. Give it a try – your taste buds will thank you!
FAQs
Q1. How long does it take to cook honey garlic chicken? Honey garlic chicken can be prepared in just 12 minutes, making it an ideal quick meal for busy weeknights. The cooking time may vary slightly depending on the thickness of your chicken pieces and your chosen cooking method.
Q2. What are the main ingredients needed for honey garlic chicken? The essential ingredients for honey garlic chicken include chicken (breast or thigh), honey, garlic, soy sauce, butter or oil, and vinegar (apple cider or rice). You’ll also need flour or cornstarch for coating the chicken.
Q3. Can I use chicken thighs instead of breast for this recipe? Yes, you can use either chicken breasts or thighs for honey garlic chicken. Thighs are often preferred for their juicier texture and richer flavor, while breasts are leaner. Both work well, so choose based on your preference.
Q4. How can I ensure my honey garlic chicken stays juicy? To keep your honey garlic chicken juicy, slice the chicken thinly (about ¼ inch thick), avoid overcooking by using a meat thermometer (aim for 165°F internal temperature), and let the chicken rest before slicing. The flour coating also helps lock in moisture.
Q5. What are some good side dishes to serve with honey garlic chicken? Honey garlic chicken pairs well with various sides. Popular options include white or brown rice, steamed vegetables like broccoli or green beans, and noodles such as egg noodles or rice noodles. You can also serve it with a low-carb option like cauliflower rice.