
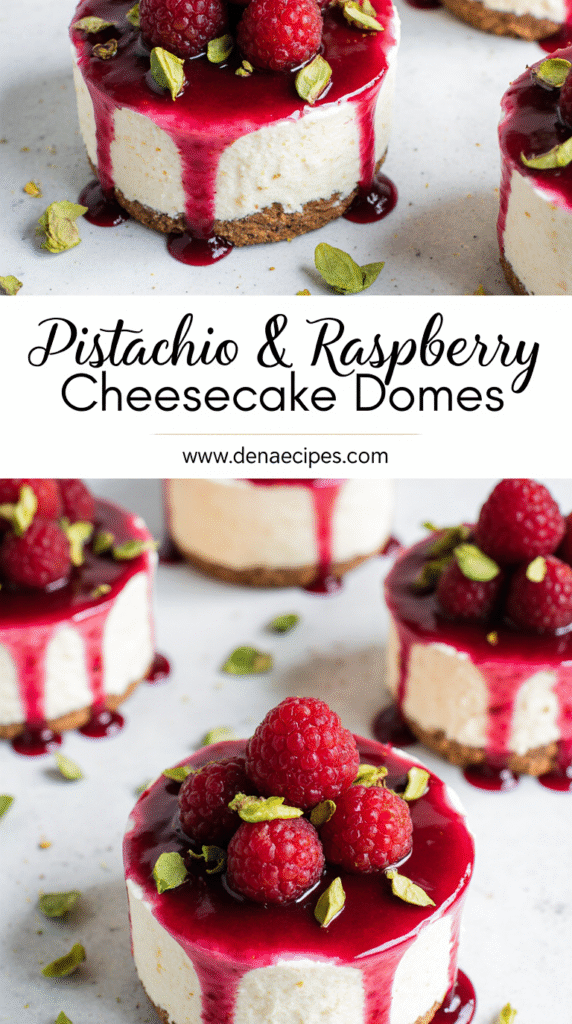
Perfect Raspberry Pistachio Cheesecake Domes: A Baker’s Secret Guide
Have you ever wondered how to create a raspberry pistachio cheesecake that’s both visually stunning and irresistibly delicious? I certainly have, which is why I’ve fallen in love with these elegant cheesecake domes that combine creamy texture with vibrant flavors.
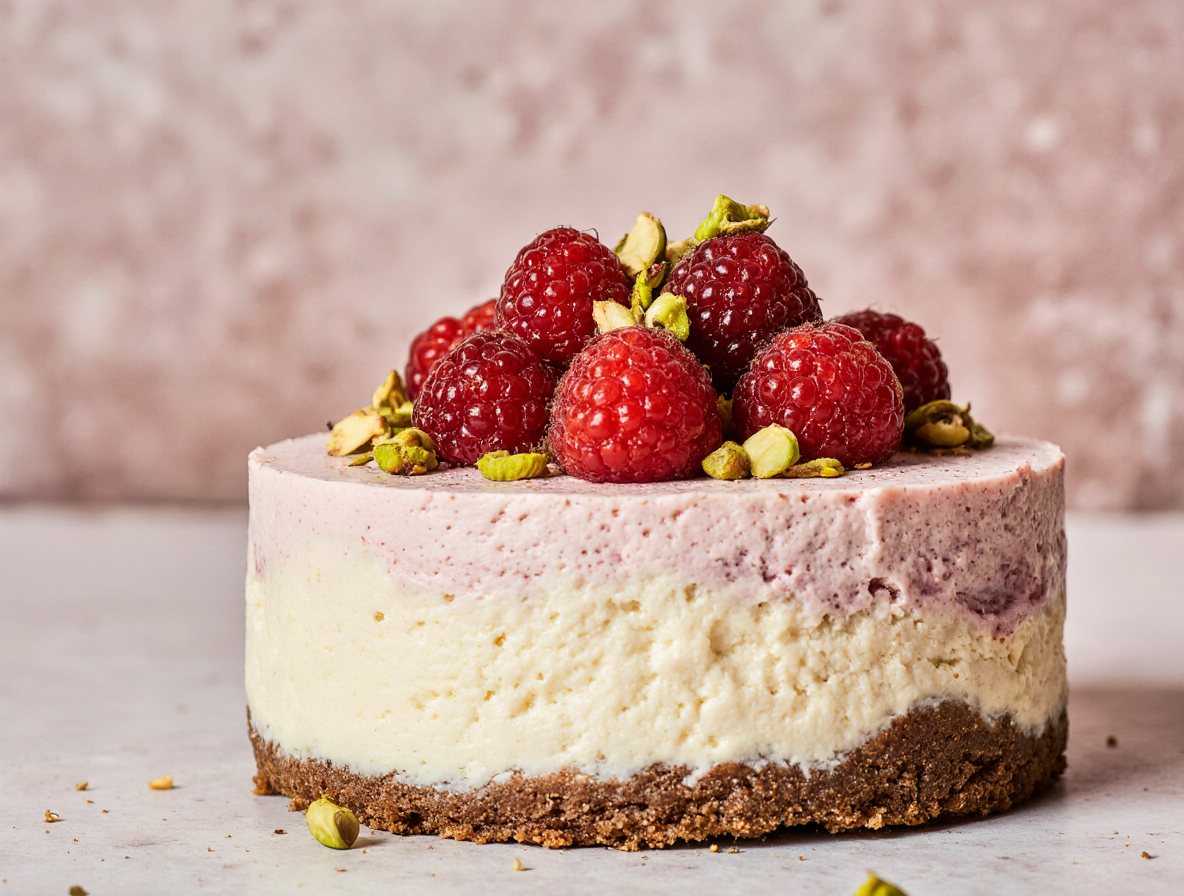
These pistachio raspberry cheesecake creations are not only a treat for the taste buds but also a feast for the eyes. The contrast between the creamy cheesecake filling, bright raspberry layer, and crunchy biscuit base offers a symphony of flavors in every bite. When I first experimented with these cheesecake domes, I decided to combine two flavors that I particularly like: tangy raspberry and gourmet pistachio. In fact, encased in a glossy white chocolate coating, these bite-sized delights become as visually stunning as they are delicious.
Throughout this guide, I’ll share my step-by-step process for creating these showstopping desserts, from building the perfect nutty pistachio base to crafting the tangy raspberry center. Whether you’re an experienced baker or just starting out, you’ll soon be creating these impressive treats that will have everyone asking for your secret recipe.
Understanding the Components of a Cheesecake Dome
The charm of dome desserts lies in their unique spherical presentation that elevates ordinary cheesecake into something extraordinary. Unlike traditional flat cheesecakes, these rounded creations offer a multi-layered experience with each bite.
What makes a dome dessert unique?
Dome desserts are culinary masterpieces created using silicone mold half sphere rounds, which give them their distinctive curved shape. Despite their complicated appearance, they’re surprisingly simple to construct. These desserts typically feature multiple layers of different textures and flavors, creating a complex eating experience that flat desserts simply can’t match.
Furthermore, dome desserts offer exceptional versatility. The molds can be filled with various components including mousse, ice cream, or even lined with chocolate for hot cocoa bombs. Each dome becomes a self-contained world of flavor, with the curved shape allowing for creative layering techniques that create visual interest when sliced.
Why pistachio and raspberry are a perfect match
Pistachio and raspberry create a harmonious balance that makes them ideal partners in desserts. The nutty, slightly sweet pistachio provides a wonderful earthy base that contrasts beautifully with the bright, tangy punch of raspberries.
Beyond flavor compatibility, these ingredients offer striking visual contrast. The deep red of raspberries against the subtle green of pistachios creates an eye-catching presentation that enhances the overall dessert experience. This pairing works especially well in dome format, where the raspberry center can be dramatically revealed when the dessert is cut open.
Additionally, the textural contrast between smooth pistachio cream and the slightly seedy texture of raspberry filling adds another dimension to each bite. The combination ultimately creates a dessert that’s sophisticated yet approachable.
Essential tools for dome assembly
To successfully create raspberry pistachio cheesecake domes, several specialized tools are necessary:
- Silicone half-sphere molds: These are the foundation of any dome dessert, typically about 2½ inches in diameter. Choose high-quality silicone for easy release.
- Round cookie cutter: A 1½-inch cutter works perfectly for creating bases that fit flush with the domes.
- Cooling rack and cookie sheet: Essential for glazing the domes with even coverage.
- Food thermometer: Critical for mirror glazes, ensuring the temperature is perfect for proper setting.
Rather than using traditional springform pans (which can be fiddly and prone to leaking), dome molds create cleaner lines and more dramatic presentations. The silicone material makes unmolding much easier than metal pans, particularly important when preserving the dome’s perfect shape.
Investing in quality tools makes the assembly process significantly more manageable and produces more professional results in your pistachio raspberry cheesecake creations.
Step-by-Step: Building the Perfect Pistachio Base
The foundation of any great raspberry pistachio cheesecake dome begins with a properly constructed base. Creating the perfect base requires attention to detail and understanding how different components work together to support your cheesecake creation.
Choosing between biscuit or sponge base
When crafting pistachio raspberry cheesecake domes, you have two excellent options for the foundation. A traditional biscuit base offers a buttery, crumbly texture that contrasts beautifully with the smooth cheesecake filling. Digestive biscuits are the most popular choice in the UK, requiring about 250g of biscuits mixed with 125g of unsalted butter. Alternatively, a light sponge base creates a softer foundation. This approach requires basic ingredients: 2 eggs, 50g sugar, 50g flour, and 1/2 tsp baking powder.
For a more distinctive flavor profile, consider these alternatives:
- Pistachio biscuit base: Combine 1/2 cup finely chopped pistachios with 1/2 cup graham cracker crumbs, 2 tbsp sugar, and 4 tbsp melted butter
- Biscoff base: Creates a caramelized foundation that pairs wonderfully with pistachio
- Oreo base: Offers a chocolate counterpoint to the pistachio and raspberry flavors
How to enhance flavor with pistachio paste
Pistachio paste represents the secret weapon in elevating your cheesecake base. While some pastes contain only blended pistachios, others include added sugar – the pure pistachio versions offer more versatility as you can adjust sweetness yourself. Incorporating pistachio paste into your biscuit mixture or sponge batter intensifies the nutty flavor without compromising texture.
Tips for pressing and chilling the base
Properly pressing your base ensures structural integrity throughout. However, many bakers make the critical mistake of compressing the base too firmly. As one expert notes, “If the base is very difficult to cut, it’s most likely been compressed too much”. Instead, spread the mixture evenly using a palette knife, then press lightly with your fingertips or the bottom of a glass.
For dome assemblies, chilling becomes even more crucial. After pressing your base, refrigerate for at least 30 minutes to allow proper setting before adding subsequent layers. This patience prevents the base from crumbling during the assembly process and ensures your raspberry pistachio cheesecake domes maintain their structural integrity.
Crafting the Raspberry Center and Cheesecake Filling
Creating the perfect filling is where the magic of a raspberry pistachio cheesecake truly happens. This step requires attention to both flavor and structure to achieve that wow factor when the dome is sliced.
Making a tangy raspberry insert
The secret to a standout raspberry center lies in creating a vibrant, slightly tart filling that freezes well. To make this essential component, I combine 200g fresh raspberries with 50g sugar and a teaspoon of lemon juice in a saucepan. As the mixture heats, the raspberries break down naturally, releasing their intense flavor. For proper thickening, a teaspoon of cornstarch dissolved in water works perfectly.
After cooking the mixture until it thickens, I pour it into small silicone molds and freeze until solid. This creates perfect raspberry “jewels” that maintain their shape when embedded in the cheesecake filling.
Whipping the pistachio cheesecake layer
For the creamy pistachio cheesecake layer, I start by beating cream cheese with powdered sugar until completely smooth. Next comes the star ingredient—pistachio paste—along with vanilla extract, both mixed thoroughly to incorporate.
Subsequently, I whip heavy cream separately until stiff peaks form, then gently fold it into the cream cheese mixture. This technique creates a light, mousse-like texture that’s still sturdy enough to hold its shape. The result is a perfectly balanced cheesecake filling with pronounced pistachio flavor.
Balancing sweetness and acidity
Balancing flavors remains crucial for a memorable cheesecake dome. Typically, cream cheese provides natural acidity that helps offset sweetness. Moreover, adding a small amount of lemon juice—just 1 teaspoon—gives the perfect balance without causing curdling.
According to experienced bakers, higher-fat creams yield a smoother, creamier taste versus lighter alternatives that emphasize tanginess. Ultimately, proper ingredient temperature plays a vital role—room temperature cream cheese beats more smoothly, eliminating lumps and ensuring silky texture.
Freezing, Glazing, and Final Assembly
The final phase of creating raspberry pistachio cheesecake domes transforms your layered creation into a professional-looking dessert. After assembling your layers, these crucial steps ensure perfect presentation and taste.
Why freezing is essential for structure
Properly freezing your cheesecake domes isn’t just helpful—it’s absolutely necessary. Once your molds are filled with the pistachio cheesecake mixture and raspberry center, they must freeze overnight until completely solid. This extended freezing time allows all components to set firmly, creating structural integrity that’s essential when unmolding.
Freezing also serves another crucial purpose—it prepares your domes for glazing. The glaze adheres better to frozen surfaces, creating that perfect mirror-like finish. Furthermore, frozen domes maintain their shape during the glazing process, whereas room temperature cheesecake would melt or collapse.
How to apply a smooth mirror glaze
For that professional finish, mirror glaze temperature control is absolutely critical. After preparing your glaze, let it cool to precisely 32-35°C (90-95°F). Use a digital thermometer for accuracy—too hot, and the glaze runs off; too cold, and it becomes gloopy, creating an uneven surface.
When ready for application:
- Remove frozen domes from molds and place on a wire rack over a tray
- Pour glaze evenly over the entire dome in one continuous motion
- Allow excess to drip for about two minutes
- Use a knife to remove drips from the bottom edge
Decorating with pistachios and chocolate
Ultimately, simple decorations often work best with these sophisticated desserts. After glazing, carefully transfer each dome to its serving plate using a spatula. Press finely chopped pistachios around the base of each dome—this not only adds flavor but cleverly hides any imperfections where the glaze meets the plate.
Alternatively, fresh raspberries, gold leaf, or a light dusting of cocoa powder provide elegant finishing touches. Remember that overly elaborate decorations can distract from the beautiful glazed surface you’ve worked so hard to achieve.
Conclusion
After mastering each step of this process, you’ll find these raspberry pistachio cheesecake domes are truly worth every minute spent creating them. Though they appear complex at first glance, the layered approach makes them surprisingly achievable for home bakers. The combination of nutty pistachio and tart raspberry creates a flavor profile that’s both sophisticated and universally appealing.
Undoubtedly, the most rewarding moment comes when you slice through the glossy exterior to reveal the vibrant raspberry center nestled within the creamy pistachio cheesecake. This dramatic reveal never fails to impress guests, who often assume such creations require professional pastry training.
Remember that patience plays a key role throughout this process. Allowing proper time for freezing between layers and before glazing ensures structural integrity that makes unmolding and finishing much easier. Additionally, temperature control during glazing transforms these domes from merely delicious to visually stunning.
Ultimately, these cheesecake domes represent the perfect special occasion dessert. Whether served at intimate gatherings or celebration dinners, they offer that perfect combination of visual impact and memorable flavor. I hope this guide inspires you to try these raspberry pistachio creations in your own kitchen. The techniques you’ve learned here can certainly be applied to countless flavor combinations, allowing you to create signature dome desserts uniquely yours.
FAQs
Q1. How do I create a perfect pistachio base for my cheesecake dome? For a pistachio base, combine finely chopped pistachios with graham cracker crumbs, sugar, and melted butter. Press the mixture lightly into the mold and refrigerate for at least 30 minutes to set before adding the filling.
Q2. What’s the secret to a smooth mirror glaze on cheesecake domes? The key to a smooth mirror glaze is temperature control. Cool the glaze to 32-35°C (90-95°F) before pouring it evenly over the frozen dome in one continuous motion. Allow excess to drip for about two minutes before removing drips from the bottom edge.
Q3. How can I incorporate raspberry flavor into my pistachio cheesecake? Create a tangy raspberry insert by cooking fresh raspberries with sugar and lemon juice, thickened with cornstarch. Pour this mixture into small molds and freeze until solid. These raspberry “jewels” can then be embedded in the cheesecake filling.
Q4. Why is freezing important when making cheesecake domes? Freezing is essential for maintaining the structure of cheesecake domes. It allows all components to set firmly, ensuring easier unmolding and better adherence of the glaze. Freeze the assembled domes overnight until completely solid before glazing.
Q5. How can I balance the sweetness in my raspberry pistachio cheesecake? To balance sweetness, incorporate a small amount of lemon juice into the cheesecake filling. The natural acidity of cream cheese also helps offset sweetness. Using a tart raspberry filling or sauce can provide a nice contrast to the sweet, creamy pistachio cheesecake.