
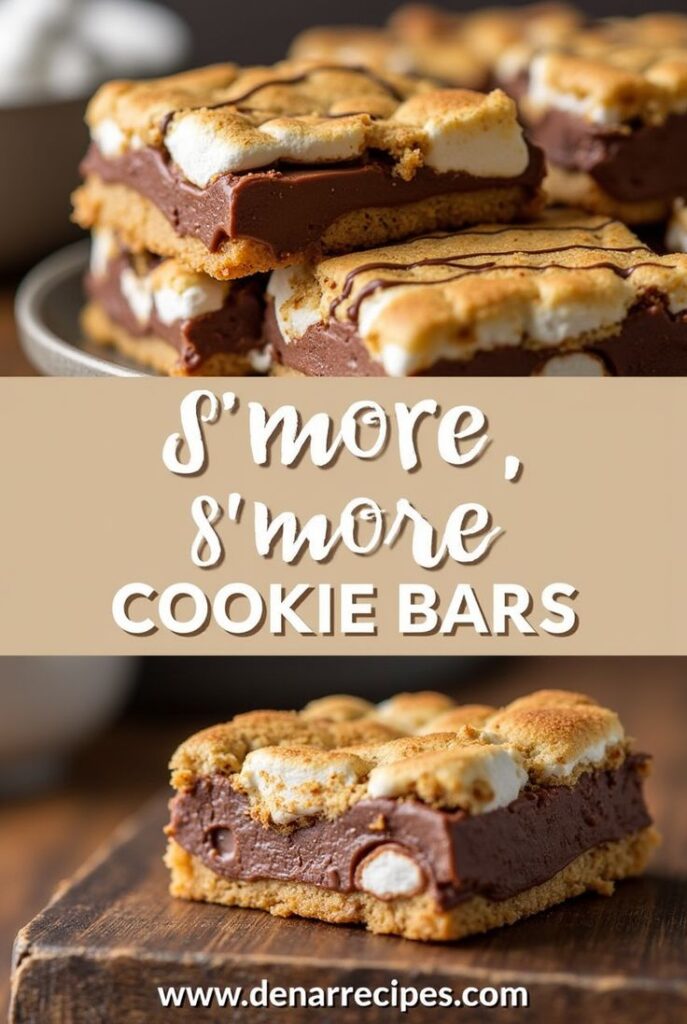
Easy S’more Cookie Bars: The No-Fail Recipe You’ll Make Again & Again
S’more cookie bars went absolutely viral on TikTok with over 4 million views, and I’m not surprised at all! These delectable treats have been one of the most popular dessert recipes on my site since their publication in 2013, proving that s’mores is a flavor that simply isn’t going out of style.
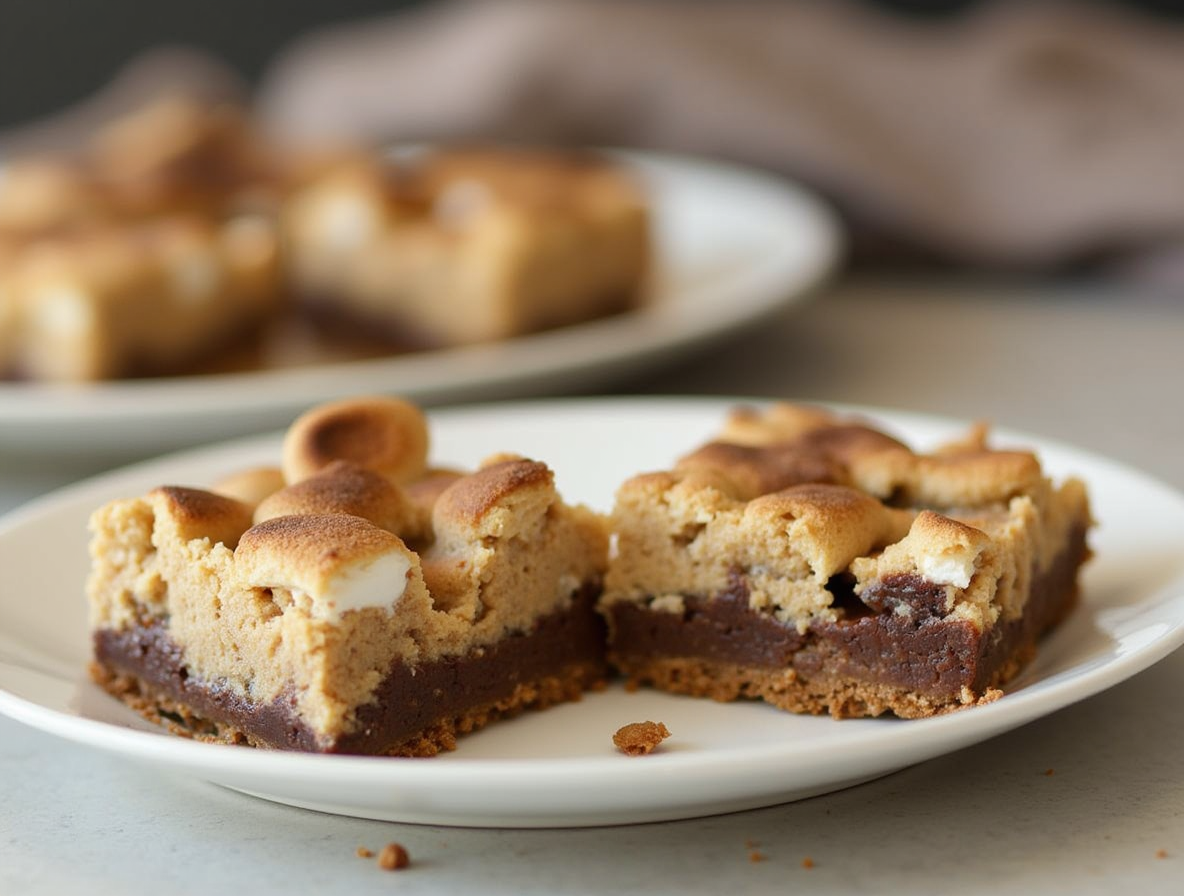
What makes this s’mores cookie bars recipe so special? For starters, you can whip them up in under 10 minutes with no mixer required. The bars feature a graham cracker crust, cookie dough with marshmallows folded in, and are topped with Hershey chocolate squares. Depending on your oven, they typically bake in just 18-25 minutes, though the total preparation time is about 3 hours when you include cooling time. These easy s’more cookie bars yield 16 perfectly portioned treats that can be stored in an airtight container for up to 3 days or frozen for up to 2 months.
If you’ve been searching for a no-fail dessert that combines the nostalgic flavors of s’mores with the convenience of a cookie bar, your search ends here!
Why These Easy S’mores Cookie Bars Work Every Time
There’s something truly magical about a dessert recipe that delivers perfect results every single time. These s’more cookie bars have become my go-to reliable treat because they combine simplicity with incredible flavor. Let me share why this recipe stands head and shoulders above other dessert options.
No mixer or chilling required
What makes these s’mores cookie bars particularly appealing is their straightforward preparation. Unlike many cookie recipes that demand electric mixers and lengthy chill times, these bars require neither. I simply stir the ingredients together with a wooden spoon or spatula, press the mixture into a pan, and they’re ready for baking. This no-fuss approach means I can satisfy my sweet tooth cravings without planning hours ahead.
Additionally, the straightforward mixing technique virtually eliminates common baking errors. Even novice bakers find success with these bars because the dough is forgiving and doesn’t require precise handling. The lack of chilling time also means the entire process moves quickly from mixing bowl to oven with minimal waiting.
Perfect balance of gooey and chewy
The texture of these s’mores cookie bars is absolutely what keeps everyone coming back for seconds. The exterior develops a slightly crisp edge while the interior maintains that coveted chewy cookie consistency. Meanwhile, the marshmallow creates pockets of irresistible gooeyness that perfectly recreate the campfire s’mores experience.
Furthermore, the chocolate layer melts just enough during baking to create that signature s’mores texture without becoming overly messy. The graham cracker elements provide a subtle crunch that contrasts beautifully with the softer components. This textural interplay creates a truly satisfying dessert experience that plain cookies simply cannot match.
Great for parties, picnics, or anytime treats
Perhaps most importantly, these s’more cookie bars have become my reliable solution for virtually any occasion. They transport easily without crumbling, unlike traditional s’mores that fall apart. The bars hold their shape at room temperature, making them ideal for summer gatherings when traditional chocolate might melt too quickly.
Moreover, their rectangular shape means they’re easily portioned for serving crowds. I’ve brought these to birthday celebrations, holiday gatherings, and casual backyard get-togethers with universal praise each time. They’re also substantially less messy than traditional s’mores, which means children can enjoy them without creating sticky disasters.
For busy weeknights at home, I appreciate having a dessert option that delivers all the nostalgic flavors of camping traditions without requiring special equipment or complicated techniques.
What You’ll Need to Make S’mores Cookie Bars
Gathering ingredients for s’more cookie bars is half the fun – no special equipment needed! I’ve found that having everything measured and ready makes the baking process flow smoothly. Let’s break down the essential components that give these treats their irresistible flavor.
Graham crackers or crumbs
The signature graham flavor is non-negotiable for authentic s’mores cookie bars. You have options here: purchase pre-made graham cracker crumbs or crush whole graham crackers yourself. For homemade crumbs, I place whole crackers in a ziplock bag and crush them with a rolling pin until finely ground. You’ll need about 1½ cups of crumbs for a standard 9×13 inch pan. Specifically, this creates that distinctive sandy texture that forms the perfect base for our bars.
Butter, sugar, and vanilla
These three ingredients form the backbone of our cookie dough. Unsalted butter works best as it allows precise control over the saltiness. For proper creaming, ensure your butter is softened to room temperature but not melty. Both granulated and brown sugars are essential – granulated provides sweetness while brown sugar adds moisture and that caramel-like depth. Pure vanilla extract (not imitation) brightens all the flavors and enhances the overall taste profile significantly.
Marshmallow creme vs. mini marshmallows
This choice dramatically affects your final result. Marshmallow creme (also called fluff) creates a smoother, more consistent texture throughout the bars. Conversely, mini marshmallows give you those distinct pockets of gooeyness that more closely mimic traditional s’mores. If using mini marshmallows, I recommend pressing some into the dough and reserving others to sprinkle on top before baking. Either option delivers that characteristic stretchy pull when you bite into the bars.
Chocolate chips or Hershey bars
Traditional s’mores call for Hershey bars, certainly, but semi-sweet chocolate chips work wonderfully too. For a twist, try chocolate chunks or even flavored chocolate bars like cookies and cream. The type of chocolate you choose affects both flavor intensity and melt factor. Dark chocolate creates a less sweet, more complex flavor profile, whereas milk chocolate offers that classic childhood s’mores taste. Regardless of which you choose, about 1½ cups of chocolate ensures every bite contains that perfect chocolate-to-marshmallow ratio.
Step-by-Step: How to Make the No-Fail S’mores Cookie Bars
Making these s’more cookie bars is wonderfully straightforward. The entire process involves just four easy steps that anyone can master, regardless of baking experience.
1. Prepare the base layer
First, preheat your oven to 350°F (175°C) and line a 9×13-inch baking pan with parchment paper, leaving some overhang for easy removal later. In a large mixing bowl, cream together the softened butter and both sugars until well combined. Next, beat in the eggs one at a time, followed by vanilla extract. In a separate bowl, whisk together flour, graham cracker crumbs, baking powder, and salt. Gradually fold the dry ingredients into the wet mixture until just combined – don’t overmix! Press about two-thirds of this dough evenly into the bottom of your prepared pan, creating a solid base about 1/4 inch thick.
2. Add chocolate and marshmallow filling
Once your base layer is firmly pressed down, evenly distribute chocolate pieces across the surface. For traditional s’mores flavor, arrange Hershey’s chocolate bar squares in a single layer. Alternatively, sprinkle chocolate chips for more consistent melting. After the chocolate layer, spoon marshmallow creme in dollops across the surface or scatter mini marshmallows evenly. The marshmallow layer should completely cover the chocolate beneath it.
3. Top with remaining dough
Take the reserved one-third of cookie dough and flatten small portions between your palms. Gently place these flattened pieces on top of the marshmallow layer. Don’t worry about covering every inch – the dough will spread slightly during baking, plus some visible marshmallow creates that authentic s’mores appearance.
4. Bake and cool before slicing
Bake for 18-25 minutes until the top turns golden brown and the edges look set. The center might still seem slightly underdone, which ensures perfectly chewy bars. Allow the pan to cool completely on a wire rack for at least 2 hours before attempting to slice. For cleanest cuts, refrigerate for 30 minutes after cooling, then use a sharp knife sprayed with non-stick cooking spray. Store your s’more cookie bars in an airtight container at room temperature for up to 3 days.
Tips, Variations, and Storage
Mastering the perfect s’more cookie bars involves a few insider tricks I’ve learned through trial and error. These tips will help you create flawless treats every time.
How to avoid sticky dough issues
Sticky dough is perhaps the biggest challenge with these bars. To combat this, I line my baking pan with parchment paper, leaving extra hanging over the edges for easy removal after baking. For the notoriously sticky top layer, try this pro tip: spread the second half of cookie dough onto parchment paper and chill it first. This makes it much easier to handle – simply peel it away and place the chilled dough plank right on top of your marshmallow layer. Without chilling, removing the dough from parchment becomes incredibly difficult.
Can you use regular marshmallows?
Absolutely not! This is non-negotiable if you want truly successful s’more cookie bars. Regular marshmallows will melt and disappear into the dough, creating unpleasant “craters” in your finished product. Furthermore, they tend to crystallize when baked, resulting in stringy, dry patches instead of that gooey texture we’re after. Marshmallow fluff (or creme) stands up to the oven’s heat and maintains its structure throughout baking. The store-bought fluff is a perfect shortcut here.
Freezing and reheating tips
These bars freeze beautifully for up to 3 months. First, cool them completely, then cut into squares and layer between sheets of parchment paper in a freezer-friendly container. Thaw overnight in the refrigerator before serving. Alternatively, you can reheat the bars in a 300°F oven for 5-8 minutes to restore their gooey texture, or microwave individual pieces for 10-15 seconds.
Fun twists: add peanut butter or sprinkles
For a delicious variation, try spreading a cup of peanut butter over the first layer of crust before adding the marshmallow fluff. Otherwise, consider these fun customizations:
- Add rainbow sprinkles to the cookie dough for a festive birthday treat
- Replace some chocolate chips with sea salt caramel chips
- Use red and green sprinkles for holiday-themed s’more cookie bars
Conclusion
These s’more cookie bars certainly deserve their viral status and enduring popularity. After making them countless times since 2013, I can confidently say they remain one of my most reliable dessert recipes. The perfect balance of graham cracker crunch, gooey marshmallow, and melted chocolate creates an irresistible treat that captures all the nostalgic flavors of campfire s’mores without any of the mess.
What makes this recipe truly special, undoubtedly, is its simplicity paired with impressive results. The no-mixer, no-chill approach means you can satisfy your sweet tooth with minimal effort and equipment. Additionally, their versatility makes them suitable for everything from casual family nights to special celebrations.
Remember that using the right ingredients – particularly marshmallow fluff rather than regular marshmallows – is key to achieving that perfect texture. Similarly, taking time to properly cool and slice these bars will reward you with picture-perfect portions every single time.
Whether you stick with the classic recipe or experiment with fun variations like adding peanut butter or festive sprinkles, these s’more cookie bars will become your go-to dessert. Therefore, the next time you need a foolproof treat that pleases crowds and satisfies cravings, look no further than this simple yet spectacular recipe!
FAQs
Q1. How long do these S’mores Cookie Bars take to make? The total preparation time is about 3 hours, including cooling. However, the actual hands-on time is less than 10 minutes, and baking takes only 18-25 minutes depending on your oven.
Q2. Can I use regular marshmallows instead of marshmallow creme? No, regular marshmallows are not recommended. They melt and disappear into the dough, creating unpleasant “craters” and dry patches. Marshmallow creme or fluff is essential for achieving the desired gooey texture.
Q3. How should I store S’mores Cookie Bars? Store the bars in an airtight container at room temperature for up to 3 days. For longer storage, you can freeze them for up to 3 months, layered between parchment paper in a freezer-friendly container.
Q4. What makes these S’mores Cookie Bars different from traditional s’mores? These bars offer the classic s’mores flavors in a convenient, less messy form. They’re easier to transport, hold their shape at room temperature, and are perfect for serving crowds without the need for a campfire.
Q5. Can I customize the S’mores Cookie Bars recipe? Absolutely! You can add peanut butter, use different types of chocolate, or incorporate sprinkles for festive variations. The base recipe is versatile and allows for creative twists while maintaining the classic s’mores flavor profile.