
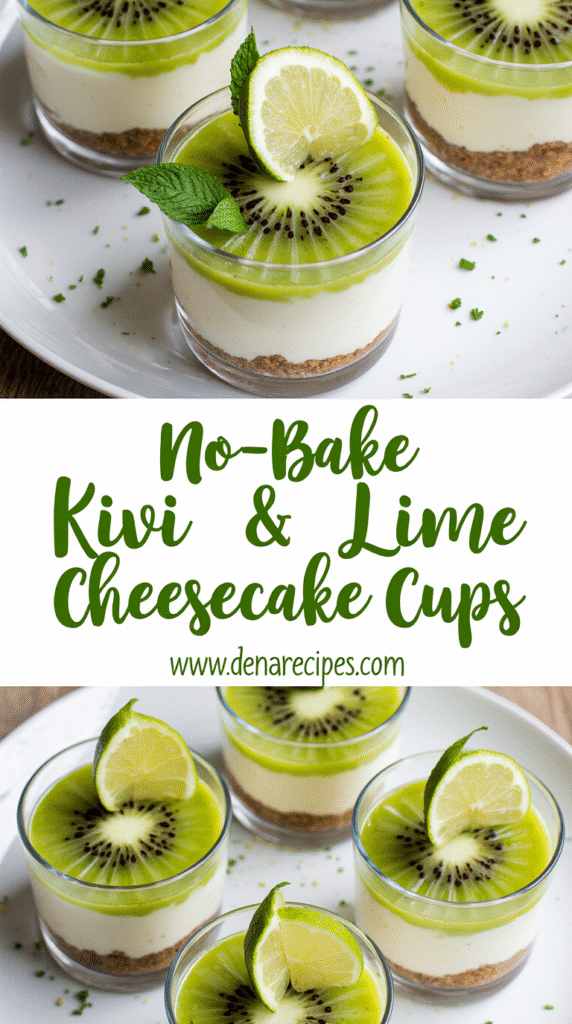
No-Bake Key Lime Cheesecake Cups: A Foolproof 15-Minute Recipe
No bake key lime cheesecake delivers the perfect balance of tangy and sweet flavors in just 10-15 minutes of prep time. Actually, this might be one of the easiest impressive desserts I’ve ever made—requiring zero oven time while still creating that wow factor when served.
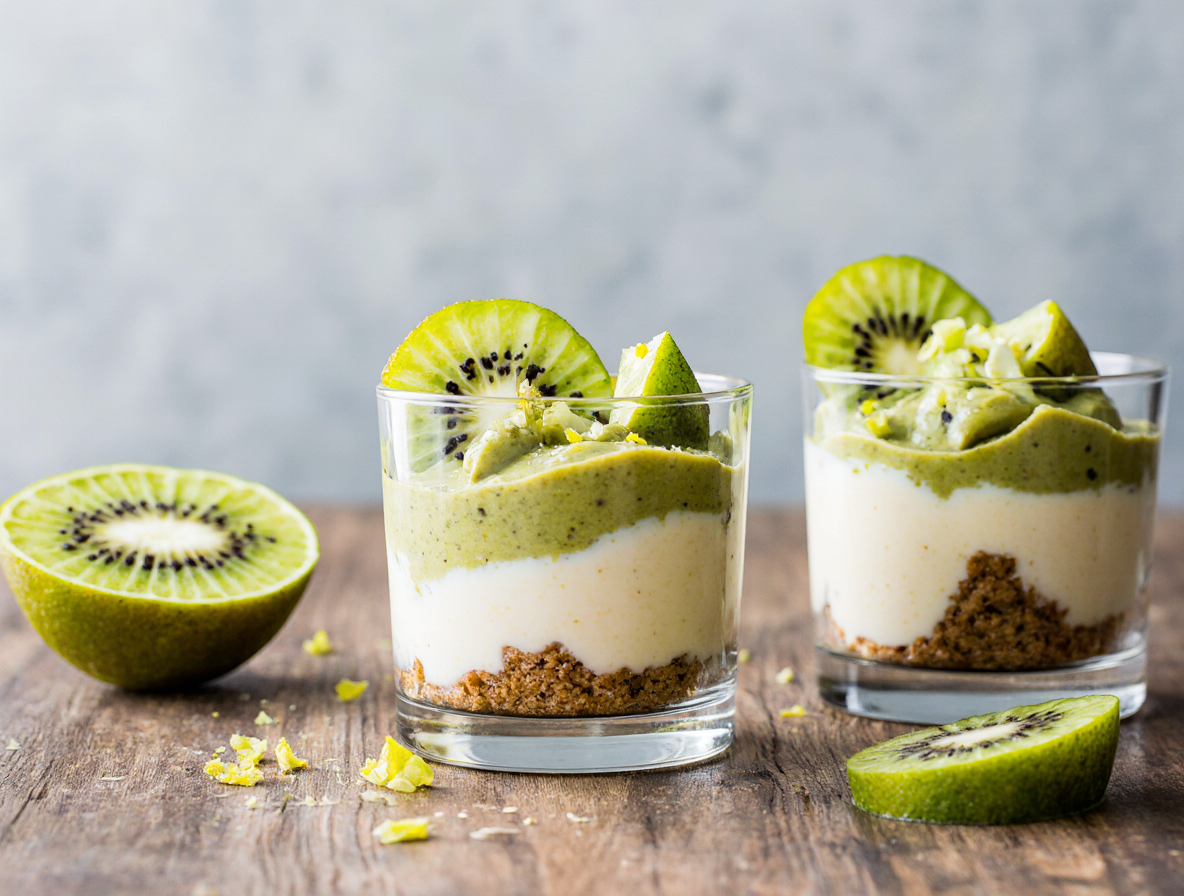
These individual no bake key lime cheesecake cups are ideal when you’re craving something special but don’t want to spend hours in the kitchen. With a simple graham cracker crust and a creamy key lime filling made with condensed milk, they come together quickly yet taste like you spent all day on them. Additionally, this recipe yields six to twelve perfect individual servings, making them ideal for gatherings or when you want portion control. The best part? You can make these easy no bake key lime cheesecake treats ahead of time and freeze them for up to three months, so you’ll always have a “perfect little bite-sized treat for spring” (or any season) ready to go.
In this guide, I’ll walk you through my foolproof method for creating these delightful key lime cheesecake cups, share my best tips for achieving the perfect texture, and offer some creative variations to customize them to your taste.
What You Need to Make Key Lime Cheesecake Cups
Gathering the right ingredients makes all the difference in creating perfect no bake key lime cheesecake cups. Let me walk you through everything you’ll need for this refreshing treat.
Ingredients for the crust
The foundation of our key lime cheesecake cups starts with a simple yet flavorful crust. You’ll need:
- 1½-2 cups graham cracker crumbs (about 10-16 full sheets)
- 2-3 tablespoons granulated sugar or ⅓ cup brown sugar[81]
- ⅓-½ cup melted unsalted butter (6-8 tablespoons)[81]
- Optional: ¼ teaspoon salt and 1 teaspoon key lime zest for extra flavor
Ingredients for the filling
The star of this dessert is the creamy, tangy filling that requires:
- 16-24 ounces full-fat brick cream cheese, softened to room temperature[81]
- ⅓-½ cup granulated sugar or ½ cup powdered sugar[81]
- ¼-½ cup key lime juice (freshly squeezed is best)
- 1-2 tablespoons key lime zest[43]
- ½-1 teaspoon vanilla extract[81]
- 1-2 cups whipped topping (Cool Whip) or homemade whipped cream
- Optional: 1-2 drops green food coloring for a hint of color
Optional toppings and garnishes
Elevate your cheesecake cups with these finishing touches:
- Extra whipped cream or Cool Whip for dolloping[71]
- Fresh key lime slices or zest for garnish[71]
- Sprinkle of graham cracker crumbs
- Fresh berries like raspberries or strawberries[81]
- Fresh mint leaves for a pop of color
- Lime curd or strawberry sauce
Recommended tools and containers
To assemble your no bake key lime cheesecake cups effectively, gather:
- Six 4-ounce jars or eight 6-ounce clear containers[82]
- Electric mixer (handheld or stand)
- Mixing bowls of various sizes
- Measuring cups and spoons
- Spatula for folding and scraping
- Food processor (optional for crushing graham crackers)[71]
- Piping bag and large tip (optional for decorative whipped cream)
- Zester or microplane for lime zest
Furthermore, using clear containers showcases the beautiful layers of your dessert. Mason jars, small drinking glasses, or even plastic dessert cups work wonderfully. If you’re planning to make these ahead, containers with lids offer convenience for storing in the refrigerator until serving time.
Remember that full-fat cream cheese produces the best texture and flavor. Likewise, fresh key lime juice delivers more authentic flavor than bottled varieties, though regular lime juice can substitute in a pinch.
Step-by-Step: How to Make No-Bake Key Lime Cheesecake Cups
Creating these delightful treats is surprisingly simple. Let’s break down the process into four easy steps that anyone can follow—even if you’ve never made cheesecake before!
1. Prepare the graham cracker crust
First, grab your graham crackers. If they’re not already crushed, pulse them in a food processor or place them in a resealable bag and crush with a rolling pin until you have fine crumbs. In a medium bowl, combine the crumbs with sugar (brown sugar adds extra flavor) and melted butter until the mixture resembles wet sand. Spoon about 1½-2 tablespoons of this mixture into each serving cup. Press firmly using the back of a spoon, a measuring cup, or your fingers to create a compact base. For a sturdier foundation, press the crumbs slightly up the sides of the cup as well.
2. Mix the creamy key lime filling
Next, in a large bowl, beat the softened cream cheese until completely smooth and free of lumps. This step is crucial for a silky-smooth filling. Subsequently, add your sweetened condensed milk and/or sugar and beat until well combined. Mix in the key lime juice and zest, being careful not to overmix. Once smooth, gently fold in your whipped topping or freshly whipped cream with a rubber spatula using slow, deliberate strokes to maintain airiness. For a subtle green color, add a drop or two of food coloring if desired.
3. Assemble the cheesecake cups
After preparing both components, it’s time for assembly. You can either spoon the filling over the crust or use a piping bag for a more professional look. To pipe, transfer the filling to a piping bag fitted with a large round or star tip (or use a ziplock bag with the corner snipped off). Fill each cup about ¾ full, leaving room for optional toppings later.
4. Chill and set before serving
Finally, place your assembled cups in the refrigerator uncovered for at least 3-4 hours or, ideally, overnight. This chilling time allows the filling to set properly and the flavors to develop fully. Before serving, you can add a dollop of whipped cream, a sprinkle of graham cracker crumbs, or a thin slice of lime as garnish.
Tips for Perfect No-Bake Cheesecake Every Time
The success of your no bake key lime cheesecake relies heavily on technique rather than complicated ingredients. After making hundreds of these delightful treats, I’ve discovered several foolproof strategies that guarantee perfect results every time.
Use room temperature cream cheese
Room temperature cream cheese is absolutely essential for a smooth, lump-free filling. Cold cream cheese simply won’t blend properly, causing you to overmix while trying to incorporate it with other ingredients. To quickly soften cream cheese, cut it into small cubes and let sit for 20-30 minutes. Alternatively, you can microwave completely unwrapped cream cheese in 10-second bursts, flipping between each burst. Remember that softened cream cheese should be used within two hours for food safety.
Don’t overmix the filling
Overmixing is perhaps the most common mistake in cheesecake preparation. Excessive mixing incorporates unwanted air, resulting in a dense, heavy texture instead of the creamy consistency we desire. To prevent this, use a hand mixer at medium speed and beat the softened cream cheese first until smooth. Subsequently, add remaining ingredients and mix until just combined—then stop immediately. For folding in whipped cream, use a gentle hand with a rubber spatula rather than a mixer.
How long to chill for best results
Patience truly pays off with no bake key lime cheesecake. Although some recipes suggest a minimum of 2-4 hours of refrigeration, I’ve found that overnight chilling (at least 6-8 hours) produces the best texture and flavor development. During chilling, the filling transforms from a soft, mousse-like consistency at 50°F to a firm, velvety density at 40°F. Never freeze the cheesecake to speed setting—this ruins the delicate texture.
Cool Whip vs. homemade whipped cream
Both options work, yet they deliver different results. Cool Whip contains stabilizers that help maintain structure in your no bake key lime cheesecake cups. Homemade whipped cream offers superior flavor although it’s less stable. If using fresh cream, whip it to stiff peaks (about 4-5 minutes) and consider adding a stabilizer like gelatin or instant pudding mix for better structure. Regardless of your choice, fold it gently into your cream cheese mixture to preserve airiness.
Serving, Storing, and Customizing Your Cheesecake Cups
These versatile no bake key lime cheesecake cups shine brightest with the right finishing touches. Moreover, they’re perfect for preparing ahead, giving you a stress-free dessert option for any occasion.
How to garnish for presentation
For an eye-catching presentation, top your key lime cheesecake cups with a dollop of whipped cream just before serving. Add a sprinkle of fresh lime zest or place a thin lime wheel on top for that perfect pop of color. Graham cracker crumbs scattered across the whipped cream create a delightful texture contrast. Consequently, for extra flair, consider adding fresh berries, mint leaves, or even toasted coconut as complementary garnishes.
Make-ahead and storage tips
One of the greatest advantages of these no bake key lime cheesecake cups is their make-ahead potential. Essentially, you can prepare them up to 2-3 days in advance. Simply cover the cups tightly with lids or plastic wrap and refrigerate. For best results, store the assembled cups without toppings, adding the whipped cream and garnishes just before serving to maintain their fresh appearance. Refrigerated cups will stay fresh for up to 3-5 days.
Freezing and thawing instructions
To freeze your key lime cheesecake cups, first leave off any whipped cream or toppings. Place the cups in freezer-safe containers and freeze uncovered for 1-2 hours until firm. Afterwards, cover them tightly with plastic wrap and aluminum foil, or secure with lids if available. These can be frozen for up to 1 month. For thawing, transfer to the refrigerator and let them defrost overnight—never at room temperature.
Flavor variations to try
Feeling adventurous? Switch the lime for lemon to create a bright lemon cheesecake variation. Alternatively, top your cups with passion fruit for a tropical twist that pairs wonderfully with the creamy filling. Other delicious topping options include strawberry sauce, chocolate ganache, caramel sauce with sea salt, or fruit preserves. Indeed, these versatile cups allow everyone to customize according to their preferences—making them perfect for gatherings where guests can add their own favorite toppings.
Conclusion
These no-bake key lime cheesecake cups truly represent the perfect balance of simplicity and wow-factor. After trying this recipe, you’ll certainly add it to your regular dessert rotation. The combination of buttery graham cracker crust with that creamy, tangy filling creates magic in every bite, all without turning on your oven.
Most importantly, this dessert fits practically any occasion. Family dinners become special with these individual servings, while parties benefit from their make-ahead convenience. The ability to freeze them for up to three months means you’ll always have an impressive dessert ready when unexpected guests arrive.
The versatility extends beyond just the serving options. You can easily customize these cups with different toppings or flavor variations based on your mood or the season. Consequently, one simple recipe opens up countless possibilities for your dessert table.
The beauty of these cheesecake cups lies not just in their taste but also their foolproof nature. Even first-time bakers can achieve perfect results by following the simple steps and tips outlined above. Remember, room temperature cream cheese and proper chilling time make all the difference!
My family requests these tangy treats regularly, especially during summer gatherings. The bright citrus flavor refreshes the palate while still satisfying sweet cravings. Therefore, I suggest making a double batch your first time—they disappear quickly!
Why not try this recipe this weekend? The minimal prep time combined with maximum flavor impact makes these no-bake key lime cheesecake cups a smart choice for busy home cooks who still want to serve something special. Your taste buds will thank you.
FAQs
Q1. How long does it take to make these No-Bake Key Lime Cheesecake Cups? These delightful treats can be prepared in just 15 minutes, with an additional chilling time of at least 3-4 hours or preferably overnight for the best texture and flavor.
Q2. Can I make these cheesecake cups ahead of time? Absolutely! You can prepare these cups up to 2-3 days in advance. Store them covered in the refrigerator and add toppings just before serving for the freshest appearance.
Q3. What’s the secret to achieving a smooth, lump-free filling? The key is using room temperature cream cheese. Let it soften for 20-30 minutes before mixing, and avoid overmixing to maintain a creamy consistency.
Q4. Can I freeze these No-Bake Key Lime Cheesecake Cups? Yes, you can freeze them for up to one month. Freeze without toppings, wrap tightly, and thaw overnight in the refrigerator before serving.
Q5. Are there any flavor variations I can try with this recipe? Certainly! You can substitute lemon for lime, or experiment with toppings like passion fruit, strawberry sauce, or chocolate ganache for different flavor profiles.