
Mashed banana pancakes
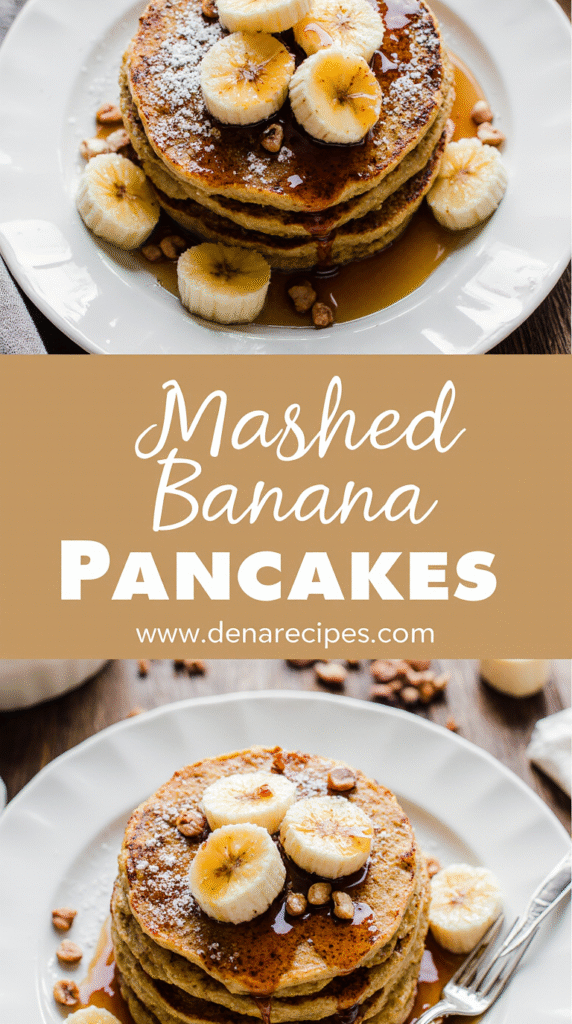
Surprisingly, the best banana pancake recipe requires just two to three simple ingredients that transform overripe bananas into a delicious breakfast. For years, this recipe has become part of morning routines for many families, actually winning hearts with its simplicity and fool-proof results. I’ve tested these pancakes more than 50 times, tweaking and perfecting the process so you don’t have to.
These easy banana pancakes are not only incredibly simple to make but also remarkably versatile. In fact, they’re significantly lower in carbohydrates than traditional pancakes and slightly higher in protein. Whether you’re looking for fluffy banana pancakes for a weekend brunch or mashed banana pancakes to accommodate dietary restrictions, this recipe delivers consistently outstanding results. The simple banana pancakes are gluten-free and dairy-free, making them perfect for various dietary needs. Furthermore, what makes these the best banana pancakes is their unique texture – crispy on the outside and firm yet creamy in the middle. If you find yourself with overripe bananas, fear not! This adaptable recipe can save the day.
The Core Ingredients That Make It Foolproof
The secret to perfect banana pancakes lies in understanding the exact role each ingredient plays. I’ve discovered through extensive testing that the quality and state of each component dramatically affects your final results.
Why overripe bananas matter
When making banana pancakes, those spotted, nearly black bananas sitting on your counter aren’t trash—they’re treasure. The ripening process converts starches into natural sugars, making overripe bananas significantly sweeter and more flavorful. They also provide natural moisture and act as excellent binders in your batter. For the best banana pancakes, look for fruits with at least a few brown spots—the darker, the better. Moreover, their softer texture makes them easier to mash into a smooth consistency, eliminating unwanted chunks in your pancakes.
Choosing the right flour (or skipping it)
Flour provides structure through its gluten content, giving your pancakes that pleasant chewiness. All-purpose flour works perfectly, however, you have multiple alternatives depending on your preferences:
- Whole wheat pastry flour provides a lighter texture than regular whole wheat while maintaining nutritional benefits
- Buckwheat flour offers a bold, distinctive flavor (perfect for gluten-free options)
- Oat flour creates hearty pancakes with a subtle oatmeal-like taste
Remarkably, you can even skip flour entirely for a two-ingredient version using just eggs and bananas, creating a custard-like pancake with creamy texture.
Eggs: the essential binder
Eggs are absolutely non-negotiable in banana pancakes. They bind ingredients together, provide crucial structure, and contribute to the rich flavor and moisture. When mixed with mashed bananas, the amylase enzyme in egg yolks actually converts remaining fruit starches into sugar, enhancing sweetness. I’ve tested alternatives like flax eggs, and unfortunately, they simply don’t work—resulting in sad banana mush instead of proper pancakes.
Optional add-ins for flavor and texture
While simple banana pancakes are delicious on their own, these add-ins elevate them further:
- Spices: Cinnamon pairs wonderfully with banana (my personal favorite addition)
- Healthy boosts: Hemp hearts or ground flaxseed add fiber and healthy fats
- Texture elements: Chopped nuts (especially toasted walnuts or pecans), chocolate chips, or coconut
- Extra fruit: Fold in blueberries or strawberries for additional freshness
First combine your core ingredients properly, then fold in these extras just before cooking for the most foolproof results.
Step-by-Step: How to Make the Best Banana Pancakes
Making perfect banana pancakes requires following a specific sequence of steps with proper technique. Let’s break down this easy banana pancake recipe into manageable stages.
1. Mash the bananas properly
Begin by peeling the banana and breaking it into chunks in a medium bowl. Use a dinner fork to thoroughly mash until it reaches a pudding-like consistency with minimal lumps. Properly mashed bananas create the foundation for smooth, flavorful pancakes. Small lumps are acceptable, but large chunks will prevent even cooking.
2. Mix in eggs and dry ingredients
Initially, whisk eggs into your mashed bananas until fully incorporated. Subsequently, add your dry ingredients (flour, baking powder, salt, and optional cinnamon) and fold gently with a rubber spatula rather than stirring vigorously. This prevents overworking the batter, which would make your pancakes dense instead of fluffy. The batter should remain slightly lumpy – this is normal!
3. Heat the pan to the right temperature
Properly heating your pan is crucial. To test readiness, sprinkle a few drops of water on the surface – they should sizzle and “dance” before disappearing. If they evaporate immediately, your pan is too hot; if they don’t sizzle, it’s too cold. Medium heat typically works best. Add a small amount of butter or oil to prevent sticking.
4. Pour and shape the batter
Pour approximately ¼ cup of batter per pancake onto the hot surface. The batter should spread naturally into a circular shape about 6 inches across. Leave space between pancakes for easier flipping.
5. Flip with care
Wait until bubbles form on the surface and the edges appear set (about 2-3 minutes). Use a thin, flexible spatula to gently slide underneath. Flip carefully, especially with two-ingredient versions which are more delicate. Any spilled batter can be nudged back under the pancake.
6. Cook until golden and fluffy
Cook the second side until golden brown (1-2 minutes more). Resist pressing down on the pancakes as this squeezes out air and reduces fluffiness. The best banana pancakes will be golden on both sides and slightly puffed in the middle.
Tips That Guarantee Fluffy Banana Pancakes Every Time
After testing this banana pancake recipe over 50 times, I’ve identified five crucial techniques that guarantee fluffy results every time. These simple adjustments make all the difference between flat, rubbery pancakes and perfectly light, airy ones.
Use a nonstick or well-greased pan
For consistently perfect banana pancakes, the right cooking surface is essential. A nonstick pan or griddle works best, though a well-seasoned cast iron skillet also performs admirably. Ideally, choose a pan with a thick bottom as it distributes heat more evenly, making your pancakes less likely to burn. To prevent sticking, lightly grease your pan—but remember that pancakes aren’t supposed to be fried. Simply rub a small amount of butter or oil with a paper towel for minimal greasing.
Don’t overmix the batter
Perhaps the most common mistake is overmixing. Once you combine wet and dry ingredients, stir just until they’re incorporated—about 10 gentle strokes should do it. Small lumps are actually desirable! Overmixing activates the gluten in flour, resulting in tough, rubbery pancakes instead of tender, fluffy ones. The evidence is clear: pancakes made from overmixed batter turn out noticeably flatter and chewier.
Keep pancakes small for easier flipping
Smaller pancakes (about ¼ cup batter each) cook more evenly and are significantly easier to flip. Leave about an inch or two between pancakes to allow for expansion and provide space for your spatula. This technique helps achieve that golden-brown exterior while ensuring the inside cooks properly.
Let the batter rest before cooking
This step is frequently overlooked yet remarkably effective. Allow your batter to rest for 5-10 minutes before cooking. During this time, the flour hydrates properly, the leavening agents distribute evenly, and any gluten that developed relaxes. The result? Lighter, fluffier pancakes with a smoother texture. Additionally, you’ll notice the batter thickening slightly during this rest period.
Adjust heat to avoid burning
Maintaining proper temperature is crucial, particularly with banana pancakes. Since they contain natural sugars from bananas rather than added sugar, they’re especially prone to burning. Medium to medium-low heat generally works best. Use the water droplet test: sprinkle a few drops on your pan—they should sizzle and “dance” before disappearing. If they evaporate instantly, your pan is too hot; if they don’t sizzle, it’s too cold.
Serving, Storing, and Reheating Made Easy
Banana pancakes aren’t just delicious fresh off the griddle—they’re equally impressive with the right toppings and proper storage techniques. After creating that perfect batch, you’ll want to know how to serve, store, and reheat them to maintain their fluffy texture and delightful flavor.
Best toppings for simple banana pancakes
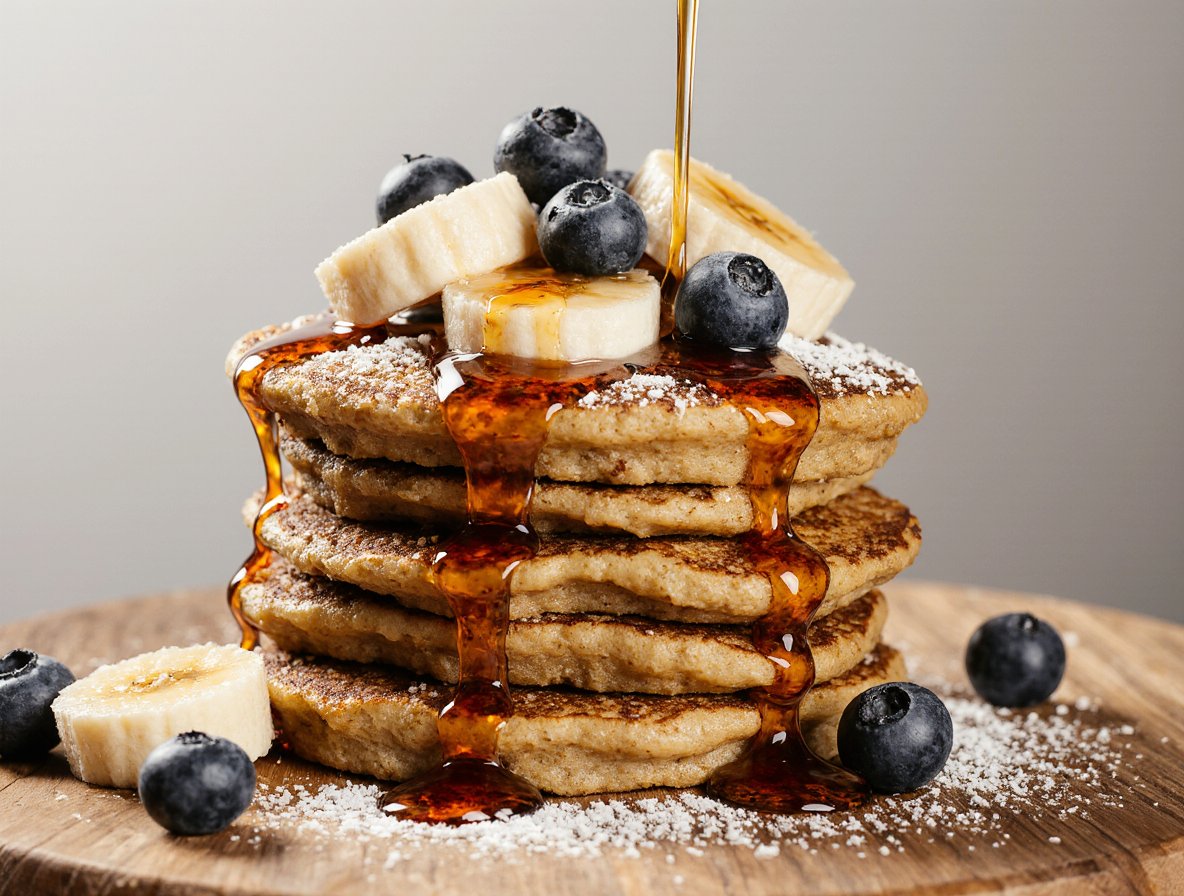
The classic maple syrup drizzle works wonderfully, nevertheless there are countless ways to elevate your banana pancakes:
- Fruit combinations: Fresh blueberries, strawberry slices, or additional banana slices provide natural sweetness
- Nutty options: A spoonful of crunchy peanut butter or almond butter adds protein and richness
- Sweet finishers: Nutella, honey drizzle, or a dusting of powdered sugar transforms plain pancakes into dessert-worthy treats
- Breakfast boost: Greek yogurt with granola creates a balanced meal with extra protein and crunch
- Seasonal flavors: Apple slices with cinnamon or coconut flakes with mango for a tropical twist
How to store leftovers in the fridge
For short-term storage, allow pancakes to cool completely at room temperature first. Store them in an airtight container or wrap tightly in foil, placing them in the refrigerator for up to 3-4 days. Importantly, avoid stacking hot pancakes as condensation will make them soggy.
Freezing tips for meal prep
Freezing extends pancake life up to 3 months, making them perfect for meal prep. First, flash freeze by arranging cooled pancakes in a single layer on a parchment-lined baking sheet for about an hour. Afterwards, stack them with parchment paper between each pancake and store in a freezer-safe bag with air removed. Label with the date to track freshness.
Reheating without drying them out
Several methods preserve that fresh-made quality:
Toaster method: My favorite for 1-2 pancakes—produces crispy edges and fluffy centers in about 1-2 minutes on a medium-high setting.
Oven approach: Ideal for larger batches—preheat to 350°F, wrap pancakes in foil (crucial to prevent drying), and heat for 10 minutes.
Microwave option: For quick results, place pancakes on a plate, cover with a damp paper towel, and heat for 20-30 seconds per pancake. This prevents the rubbery texture microwaves often create.
Essentially, you’ll never need to waste a single pancake again with these simple strategies.
Conclusion
After countless mornings flipping these pancakes, I can confidently say this recipe stands as the ultimate solution for those spotty bananas on your counter. The beauty lies not only in its simplicity but also in its remarkable consistency. Those three core ingredients—overripe bananas, eggs, and optional flour—work together to create something truly special each time.
Many pancake recipes promise perfection yet deliver disappointment. This one, however, delivers on its promises. The perfect banana pancake emerges crispy outside, creamy inside, and wonderfully adaptable to your dietary needs. Gluten-free? No problem. Dairy-free? Absolutely covered.
You might wonder whether such a simple recipe can really satisfy your breakfast cravings. Trust me, it can. The natural sweetness from properly ripened bananas eliminates the need for added sugar, while the eggs provide structure and protein that keeps you full longer than traditional pancakes.
The techniques matter just as much as the ingredients. Remember these key points: never overmix your batter, let it rest briefly before cooking, maintain proper heat, and keep your pancakes reasonably sized for easy flipping. These simple adjustments transform good pancakes into exceptional ones.
What truly makes this recipe stand apart is its flexibility. You can enjoy these pancakes fresh off the griddle with your favorite toppings, store them for busy mornings, or freeze batches for future meal prep. Their versatility makes them perfect for families, individuals with dietary restrictions, or anyone seeking a reliable breakfast option.
Next time those bananas turn spotty, rather than tossing them in the trash, give this foolproof recipe a try. The minimal ingredient list, straightforward preparation, and consistent results will surely make these banana pancakes a permanent addition to your breakfast rotation. Your morning routine will thank you!
FAQs
Q1. How can I prevent my banana pancakes from falling apart? To keep your banana pancakes intact, mash the bananas thoroughly to avoid large chunks, cook on low heat, and allow the bottom to brown slowly before flipping. Ensure your pan is properly heated and greased before adding the batter.
Q2. What’s the secret to making fluffy banana pancakes? For fluffy banana pancakes, use overripe bananas, don’t overmix the batter, and let it rest for 5-10 minutes before cooking. Cook on medium heat and resist pressing down on the pancakes while they cook to maintain their fluffiness.
Q3. Are there any special ingredients that can enhance my pancakes? While not necessary, you can add cinnamon for extra flavor, or incorporate add-ins like chopped nuts, chocolate chips, or additional fruits for texture and taste. The key is to use high-quality, overripe bananas for natural sweetness and flavor.
Q4. Can I make these pancakes gluten-free or dairy-free? Yes, these banana pancakes can easily be made gluten-free by using alternative flours like buckwheat or oat flour, or even skipping flour entirely. They’re naturally dairy-free when cooked in oil instead of butter.
Q5. How should I store and reheat leftover banana pancakes? Store cooled pancakes in an airtight container in the refrigerator for up to 3-4 days, or freeze for up to 3 months. To reheat, use a toaster for crispy edges, wrap in foil and heat in the oven, or microwave covered with a damp paper towel to prevent drying out.