
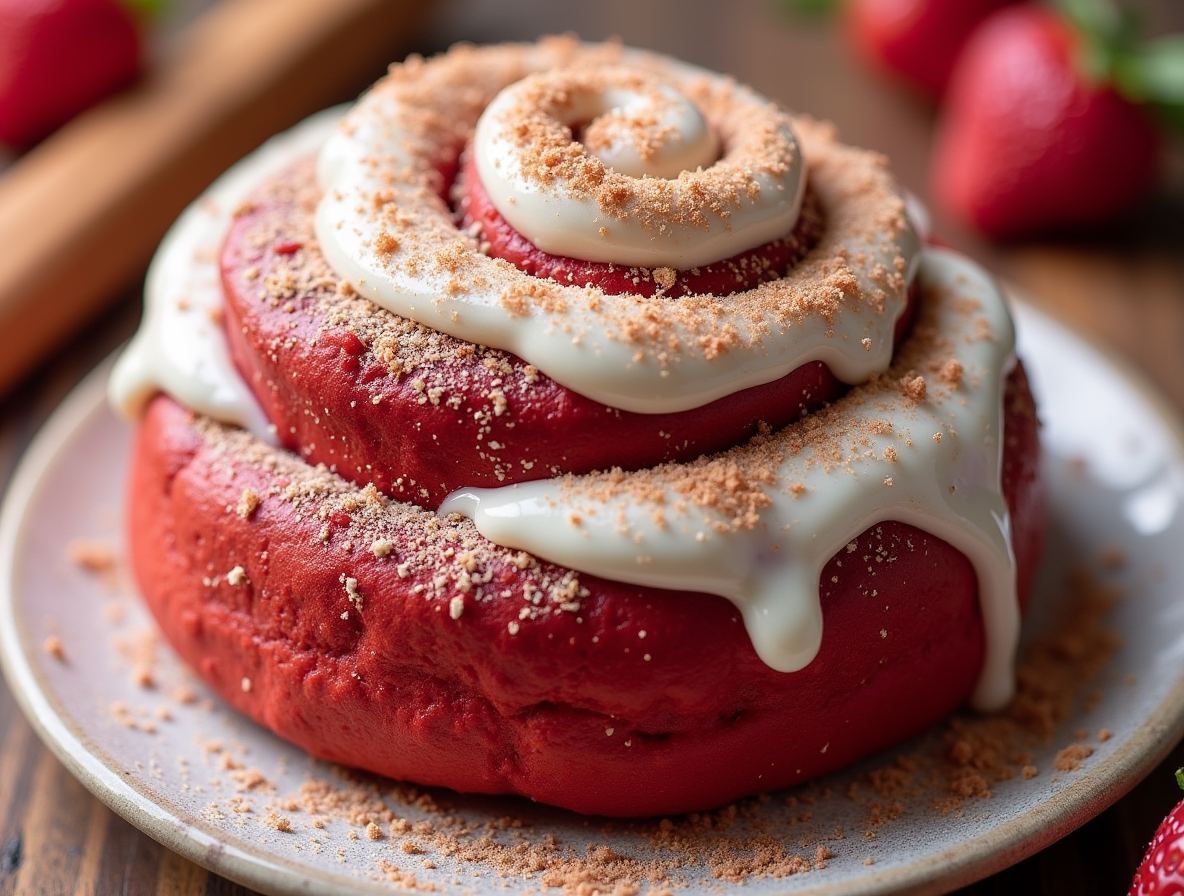
How to Make Perfect Red Velvet Cinnamon Rolls from Scratch: A Foolproof Guide
Red velvet cinnamon rolls from scratch combine the unique flavors of red velvet cake with classic cinnamon rolls, creating a treat that’s more than just chocolate dyed red. Despite seeming complex, these rolls can be mastered by anyone willing to follow our foolproof guide. While a boxed cake mix version exists, making them from scratch allows you to experience their authentic flavor profile with cocoa, buttermilk, and a hint of acidity.
I’ve perfected this red velvet cinnamon roll recipe after numerous attempts, and now I’m sharing all my secrets with you. The process takes about 3 hours and 15 minutes from start to finish, including 2 hours of rising time. However, the effort is definitely worth it when you pull a tray of 12 perfectly puffed, light brown rolls from your oven after just 15-20 minutes of baking at 350°F. Additionally, if time is a concern, you can prepare the dough ahead and refrigerate it overnight – a convenient option for busy bakers who still want to enjoy fresh, homemade red velvet cinnamon rolls.
Essential Ingredients for Red Velvet Cinnamon Rolls
Creating successful red velvet cinnamon rolls from scratch begins with gathering the right ingredients. The unique combination of cocoa, vanilla, and tangy cream cheese frosting sets these rolls apart from traditional cinnamon rolls. Let’s break down everything you’ll need for each component.
Dough ingredients: flour, yeast, milk, eggs, cocoa
The foundation of perfect red velvet cinnamon rolls starts with:
- Flour: 4-4¼ cups all-purpose flour works best for these rolls. While some recipes call for bread flour, regular all-purpose flour creates the perfect texture without specialty ingredients.
- Yeast: One packet (2¼ teaspoons) of active dry yeast or instant yeast will properly leaven your dough. The yeast needs to be fresh to ensure proper rising.
- Milk: Warm whole milk (around 110°F) activates the yeast effectively. Although whole milk is preferred for its fat content and richness, 2% milk works well too. For dairy-free options, oat milk provides the closest texture to dairy milk.
- Eggs: Two room-temperature eggs add structure and richness to the dough. Let them sit out for about 2 hours before using.
- Cocoa powder: 2-3 tablespoons of unsweetened cocoa powder provides that signature red velvet flavor. Dutch-process cocoa works particularly well for its smooth taste.
- Red food coloring: For that vibrant red color, gel food coloring works better than liquid and won’t affect the taste as much. 1-2 teaspoons is typically sufficient.
- Additional ingredients: Sugar, salt, butter, and sometimes vinegar round out the dough ingredients. The vinegar enhances the red color and provides that subtle tang red velvet is known for.
Filling ingredients: butter, brown sugar, cinnamon
The perfect filling creates that gooey, sweet center:
- Butter: ½ cup (1 stick) of softened, unsalted butter creates the base for the filling. Room temperature butter spreads more easily than melted.
- Brown sugar: ½-¾ cup packed brown sugar provides deep caramel notes. Some recipes combine it with white sugar for balance.
- Cinnamon: 1-2 tablespoons of ground cinnamon gives that warm, spicy flavor we all love in cinnamon rolls.
Icing ingredients: cream cheese, powdered sugar, vanilla
The crowning glory of red velvet cinnamon rolls is the tangy cream cheese frosting:
- Cream cheese: Use 8 ounces of full-fat cream cheese at room temperature for the smoothest texture. The brick-style cream cheese works better than the tub variety.
- Powdered sugar: 1-2 cups of sifted powdered sugar sweetens and thickens the frosting without graininess.
- Butter: ½ cup (1 stick) of softened unsalted butter adds richness to the frosting.
- Vanilla: 1 teaspoon of pure vanilla extract or vanilla bean paste adds depth of flavor. Vanilla bean paste offers lovely specks of vanilla bean.
- Salt: Just a pinch balances the sweetness and enhances all other flavors.
Having all ingredients measured and at the proper temperature before starting will make the baking process much smoother and more enjoyable.
Step-by-Step Process to Make the Dough and Rolls
The magic of red velvet cinnamon rolls happens in the making – transforming simple ingredients into a decadent treat through six crucial steps. Let’s dive into the process of creating these vibrant, flavorful rolls from scratch.
1. Activate the yeast
First, warm milk to approximately 110°F – it should feel like warm bath water. This temperature is critical as too hot will kill the yeast, while too cold won’t activate it properly. Pour the warm milk into a small bowl, then sprinkle active dry yeast on top along with a teaspoon of sugar. Let this mixture sit undisturbed for about 10 minutes until it becomes foamy – a sign your yeast is alive and ready to work.
2. Mix and knead the dough
Once your yeast is activated, combine it with the dry ingredients (flour, cocoa powder, sugar, and salt) in the bowl of a stand mixer fitted with a dough hook. Add eggs, butter, and red food coloring. Mix on low speed initially, then increase to medium and knead for 4-5 minutes until the dough forms a smooth, slightly tacky ball that pulls away from the sides of the bowl. The dough should be bright red and elastic – a signature trait of perfect red velvet cinnamon rolls from scratch.
3. Let the dough rise
Transfer your dough to a lightly oiled bowl, cover with plastic wrap or a clean kitchen towel, and place in a warm spot. Allow the dough to rise undisturbed for 1-2 hours until it doubles in size. The rising time varies based on room temperature – warmer environments speed up the process.
4. Roll out and add filling
After the first rise, gently punch down the center of the dough to release air bubbles. On a lightly floured surface, roll the dough into a rectangle approximately 18×10 inches. Spread softened butter evenly across the surface, leaving a small margin at one edge. Sprinkle your cinnamon-sugar mixture over the butter, ensuring even coverage.
5. Slice and second rise
Starting from the long edge without the margin, tightly roll the dough into a log. Using a sharp knife or unflavored dental floss, cut into 12 equal slices. Arrange these in a greased 9×13-inch baking pan, then cover again and allow a second rise for 30-45 minutes until puffy and touching.
6. Bake to perfection
Finally, bake in a preheated 350-375°F oven for 15-25 minutes until the tops are light golden brown. Be careful not to overbake – this ensures your red velvet cinnamon rolls remain soft and tender in the center.
How to Make the Perfect Cream Cheese Frosting
The crowning glory of homemade red velvet cinnamon rolls from scratch is undoubtedly the cream cheese frosting – that perfect balance of tangy creaminess that melts slightly into the warm rolls. Making this frosting isn’t difficult, yet there are specific techniques that elevate it from good to absolutely perfect.
Use room temperature ingredients
Room temperature ingredients are the foundation of silky-smooth cream cheese frosting. For this red velvet cinnamon roll recipe, you’ll need:
- Cream cheese: Use full-fat brick-style cream cheese, never the spreadable tub variety. Leave it out for at least 2 hours before using to ensure it’s completely softened.
- Butter: Similarly, your butter must reach true room temperature – you should be able to press a butterknife through it with zero resistance.
Consequently, temperature alignment between these two main ingredients prevents lumps and splitting. One professional tip: microwave softened cream cheese on low for just a few seconds if you’re unsure it’s soft enough.
Beat until smooth and fluffy
The mixing technique makes all the difference in creating professional-quality frosting:
- First, beat the cream cheese alone in your mixing bowl until completely smooth.
- Subsequently, add the softened butter and beat until the mixture is homogeneous with no lumps, approximately 2 minutes.
- Gradually add sifted powdered sugar (usually 1-2 cups) in batches, mixing on low speed initially.
- Mix in 1 teaspoon vanilla extract and a pinch of salt.
- Beat the mixture on high speed for about 2 minutes until light and fluffy.
Primarily, avoid overmixing after adding sugar as this can break the frosting, resulting in a runny consistency that won’t hold its shape.
When to frost the rolls
Timing is crucial when applying frosting to your red velvet cinnamon rolls. Allow the freshly baked rolls to cool on a wire rack for approximately 15 minutes before applying the cream cheese frosting. This brief cooling period prevents the frosting from completely melting yet allows it to slightly seep into the warm rolls.
Furthermore, after applying the frosting, let the rolls sit for another 15 minutes. During this time, the frosting will partially melt into the rolls, creating that perfect gooey texture that makes red velvet cinnamon rolls from scratch so irresistible.
Should you prepare the frosting in advance, store it covered in the refrigerator. Just remember to bring it back to room temperature and briefly rewhip before using to restore its spreadable consistency.
Storage, Reheating, and Make-Ahead Tips
Preserving the freshness of your red velvet cinnamon rolls from scratch ensures you can enjoy them beyond baking day. Proper storage, freezing, reheating, and make-ahead techniques allow you to savor these treats whenever the craving strikes.
How to store at room temperature or fridge
Freshly baked red velvet cinnamon rolls can be stored at room temperature for 2-4 days in an airtight container. For unfrosted rolls, room temperature storage works perfectly, but once you’ve applied cream cheese frosting, refrigeration becomes essential for food safety.
In the refrigerator, properly stored rolls remain fresh for 5-7 days. Wrap them tightly in plastic wrap or place them in an airtight container to prevent them from drying out. Essentially, the key is protecting them from air exposure which causes staleness.
Freezing instructions
To freeze red velvet cinnamon rolls from scratch, first let them cool completely. Afterward, you have two options:
- Individual wrapping: Wrap each roll separately in plastic wrap, followed by aluminum foil, then place in a freezer-safe bag.
- Batch freezing: Place rolls in an airtight container with layers separated by parchment paper.
Properly frozen rolls maintain quality for up to 3 months. Notably, it’s better to freeze baked rolls rather than unbaked ones, as their high sugar content doesn’t freeze well.
Reheating without drying out
To reheat red velvet cinnamon rolls without drying them out:
- Microwave method: Heat individual rolls for 20-30 seconds until warm. This is quickest for single servings.
- Oven method: Preheat to 325-350°F, cover rolls loosely with foil (crucial for moisture retention), and warm for 5-10 minutes.
For extra moisture, sprinkle a few drops of water on rolls or add a small pat of butter before reheating. Primarily, covering the rolls traps steam, creating a humid environment that revitalizes them.
Overnight proofing method
The overnight proofing method for red velvet cinnamon rolls from scratch is perfect for fresh-baked breakfast rolls without early morning work:
- Prepare and shape rolls according to the recipe.
- Place them in a baking dish, cover tightly, and refrigerate immediately (before the second rise) for up to 16 hours.
- The next morning, remove them from the refrigerator and let them sit at room temperature for about 30 minutes while preheating your oven.
- Bake as directed in your recipe.
First-time bakers often appreciate this method as it breaks the process into manageable steps while developing deeper flavors.
Conclusion
Mastering red velvet cinnamon rolls from scratch certainly transforms any home baker into a pastry artist. Throughout this guide, we’ve explored the unique combination of cocoa, buttermilk, and that signature red color that makes these rolls so special. Additionally, we’ve broken down what once seemed complex into manageable steps anyone can follow.
Remember, patience remains your greatest ally when working with yeast dough. The rising time might test your patience, but the reward – those perfectly puffed, aromatic rolls – makes every minute worthwhile. Likewise, room temperature ingredients prove essential for that silky-smooth cream cheese frosting that crowns these delightful treats.
Time constraints shouldn’t deter you from enjoying fresh-baked goodness, either. The overnight proofing method offers a perfect solution for busy bakers, allowing you to wake up to nearly-ready rolls. Furthermore, proper storage techniques mean your creations can be enjoyed for days after baking.
My journey to perfect these red velvet cinnamon rolls took numerous attempts and adjustments. Your first batch might not be flawless – though it will still taste amazing! Each subsequent batch will improve as you develop a feel for the dough and perfect your rolling technique.
Take the plunge and try this recipe. The process itself – kneading the vibrant red dough, smelling the cinnamon-sugar filling, watching the rolls puff up during baking – brings almost as much joy as that first heavenly bite of warm, frosted goodness. These rolls will undoubtedly become a treasured recipe in your baking collection, requested by family and friends for years to come.
FAQs
Q1. How long does it take to make red velvet cinnamon rolls from scratch? The entire process takes about 3 hours and 15 minutes, including 2 hours of rising time. The actual baking time is only 15-20 minutes at 350°F.
Q2. Can I prepare the dough for red velvet cinnamon rolls ahead of time? Yes, you can prepare the dough ahead and refrigerate it overnight. This is a convenient option for those who want to enjoy fresh, homemade rolls without spending too much time in the kitchen in the morning.
Q3. What’s the secret to making perfect cream cheese frosting for red velvet cinnamon rolls? The key is using room temperature ingredients, especially cream cheese and butter. Beat the mixture until smooth and fluffy, and avoid overmixing after adding sugar to prevent a runny consistency.
Q4. How should I store leftover red velvet cinnamon rolls? Unfrosted rolls can be stored at room temperature for 2-4 days in an airtight container. Once frosted with cream cheese, store them in the refrigerator for up to 5-7 days. For longer storage, you can freeze them for up to 3 months.
Q5. What’s the best way to reheat red velvet cinnamon rolls without drying them out? For individual servings, microwave for 20-30 seconds. For larger batches, cover loosely with foil and warm in a 325-350°F oven for 5-10 minutes. Adding a few drops of water or a small pat of butter before reheating can help maintain moisture.