
How to Make Restaurant-Style Beef Cheese Chimichangas (Chef’s Secret Tips)
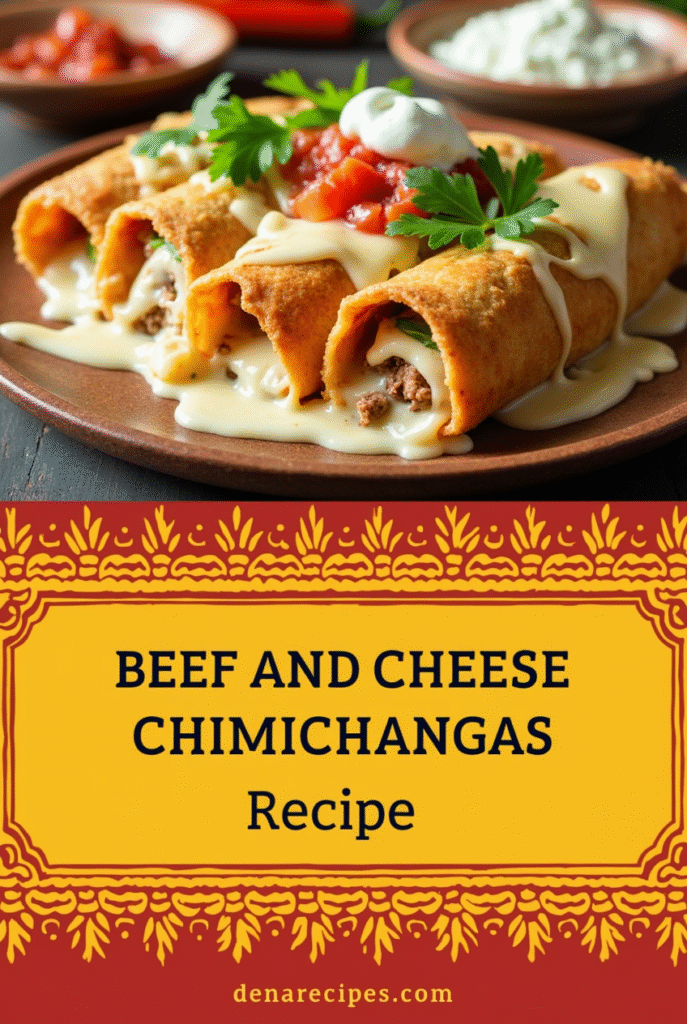
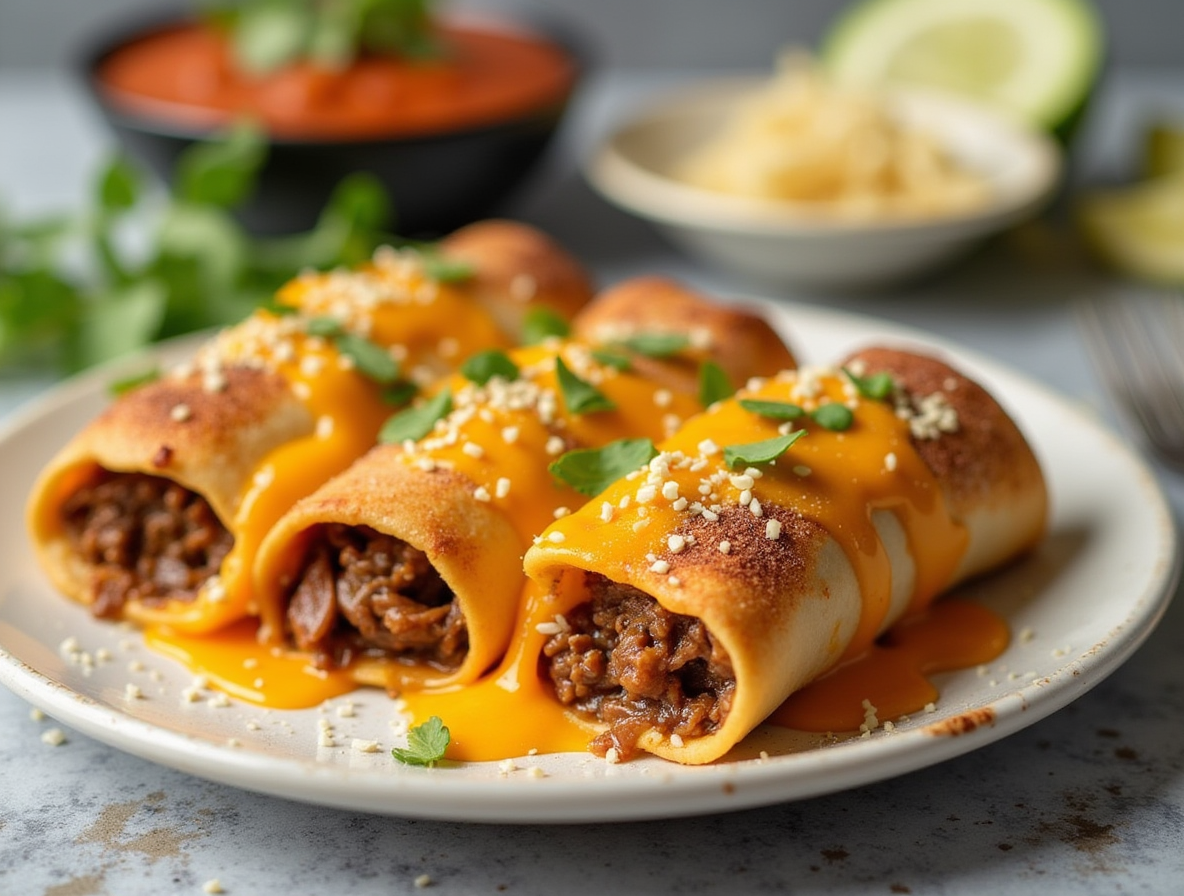
Beef cheese chimichangas are often confused with burritos, but the key difference is they’re deep-fried until crispy, creating that irresistible crunch we all love. These delicious Mexican treats consist of flour tortillas filled with savory ground beef, melted cheese, refried beans, and sometimes rice, all topped with flavorful sauce and more cheese.
In our household, making beef and cheese chimichangas has become a family favorite. Not only is cooking these at home more economical than dining out, but the entire process takes just 30 minutes—10 minutes for preparation and 20 minutes for cooking. Additionally, a typical beef and cheese chimichanga recipe yields about 6 servings, making it perfect for family dinners or small gatherings.
Throughout this guide, we’ll share how to make beef chimichangas that rival your favorite restaurant’s version. If you’re health-conscious, don’t worry—we’ll also cover a baked beef bean and cheese chimichanga alternative that you can prepare at 400 degrees Fahrenheit for about 25 minutes. With approximately 369 calories per serving, containing 25g of fat and 20g of protein, these hearty chimichangas provide a satisfying meal option you can customize to your preferences.
What is a beef and cheese chimichanga?
The classic beef cheese chimichanga represents a delicious cornerstone of Mexican-American cuisine that has gained widespread popularity throughout the Southwestern United States. Essentially, this culinary creation consists of a flour tortilla filled with savory ingredients and deep-fried until achieving a satisfying golden crispness.
The chimichanga originated approximately a century ago, with many food historians attributing its creation to Arizona in the 1920s. According to popular legend, a cook accidentally dropped a burrito into a deep fryer, creating what would become a beloved Tex-Mex staple. This happy accident has since evolved into one of the most recognizable dishes in Mexican-American restaurants.
How it differs from a burrito
While chimichangas and burritos share similar appearances, several key differences distinguish these two dishes:
- Cooking method: The fundamental difference lies in preparation—chimichangas are deep-fried, whereas burritos are not. This cooking method gives chimichangas their characteristic crispy exterior.
- Serving style: Burritos typically come wrapped in foil and eaten by hand, whereas chimichangas are served on plates due to their fried nature. Furthermore, chimichangas often feature toppings like melted cheese, sauces, lettuce, and sour cream on the exterior rather than inside.
- Filling differences: Though both contain similar base ingredients, chimichangas generally feature more meat and fewer vegetables than burritos. Moreover, chimichangas tend to have fewer beans and rice fillings since these ingredients don’t always fry well.
Common ingredients used
Traditional beef and cheese chimichanga recipes incorporate specific ingredients that create their distinctive flavor profile:
- Protein: Most commonly ground beef, though variations include carne asada (grilled steak), barbacoa (braised beef), carnitas (pork), or shredded chicken.
- Beans: Typically refried beans, black beans, or pinto beans provide substance and protein.
- Cheese: Classic options include Cheddar, Monterey Jack, or Chihuahua cheese, either inside the chimichanga or melted on top.
- Rice: White rice, yellow rice, or Mexican-style rice often fills out the interior.
- Seasonings: Common flavorings include chili powder, cumin, oregano, garlic, and onions.
- Toppings: Traditionally served with lettuce, tomatoes, guacamole, salsa, and sour cream on the side or on top.
When making beef and cheese chimichangas at home, you can customize these elements to suit your preferences while maintaining the dish’s essential deep-fried character and hearty fillings.
How to make beef and cheese chimichangas at home
Creating restaurant-quality beef cheese chimichangas at home requires minimal ingredients yet delivers maximum flavor. I’ve perfected this technique after many attempts and can confirm it’s easier than you might think.
Step-by-step cooking instructions
Initially, prepare your beef filling by browning 1 pound of ground beef with chopped onion and minced garlic in a skillet over medium heat for about 8 minutes. Drain excess fat, subsequently add seasonings like taco seasoning (½ teaspoon), oregano (1 teaspoon), cumin (½ tablespoon), and chili powder (1 tablespoon). For enhanced flavor, stir in sour cream (¼ cup), chopped green chilies (4 ounces), and vinegar (2 tablespoons).
Once fully mixed, remove from heat and incorporate shredded cheddar cheese (1 cup). Allow this mixture to cool slightly before assembly to prevent soggy tortillas.
Meanwhile, warm your flour tortillas briefly in the microwave (15-20 seconds) or in a dry skillet until pliable. Place approximately ⅓ cup of filling in each tortilla’s center, being careful not to overfill.
Tips for folding and sealing
Proper folding is crucial for successful chimichangas. Begin by folding the bottom edge up and over the filling. Next, fold in both sides toward the middle, then roll upward to form a secure rectangular package. The seam should remain on the bottom.
For extra security, especially when frying, consider these professional techniques:
- Place chimichangas seam-side down first when cooking
- Hold with tongs for about 15 seconds when first placed in oil
- Secure with toothpicks if needed (soak them in water first if frying)
Deep frying vs. baking vs. air frying
Each cooking method offers distinct advantages:
Deep Frying: Heat oil to 375°F and fry for 1-2 minutes per side until golden brown. This creates the most authentic, crispy exterior but adds more calories.
Baking: Brush with oil and bake at 400°F for 25 minutes, flipping halfway through. This healthier option still achieves good crispiness.
Air Frying: Set to 375-400°F for 8-10 minutes total, flipping halfway. This method provides excellent crispiness with minimal oil – spray lightly with cooking oil first.
Whatever method you choose, let chimichangas rest briefly after cooking before serving to prevent burned mouths and allow fillings to set.
Serving and topping ideas
The true art of enjoying beef cheese chimichangas lies in their presentation and accompaniments. After mastering the preparation, these final touches transform a good chimichanga into an unforgettable dining experience.
Best side dishes to pair with
First and foremost, authentic Mexican rice and refried beans stand as traditional companions to beef and cheese chimichangas. These classics provide the perfect balance to the rich, crispy main dish. For a complete feast, consider serving your chimichangas with chips, salsa, and guacamole alongside a refreshing piña colada fruit salad.
Beyond the basics, several creative sides can elevate your meal:
- A black bean and chile potato salad offers a starchy counterpoint with a spicy kick
- Corn and bean salad brings fresh, vibrant flavors that complement the hearty chimichanga
- Sweet potato fries provide an unexpected yet delicious alternative to traditional sides
Toppings to enhance flavor
To enhance your beef and cheese chimichanga recipe, experiment with these restaurant-worthy toppings:
Creamy elements like guacamole, sour cream, or Greek yogurt cut through the richness while adding luxurious texture. Fresh components including shredded iceberg lettuce, pico de gallo, and minced cilantro introduce brightness and crunch.
For cheese lovers, try a showering of sharp cheddar or cotija for additional savory notes. Heat enthusiasts might appreciate jalapeños (fresh or pickled) or a drizzle of hot sauce to customize spice levels.
How to plate like a restaurant
Traditionally, restaurants serve chimichangas in one of two styles. Some establishments present them smothered in salsa and melted cheese, while others prefer showcasing the crispy exterior by serving toppings on the side.
For the most impressive presentation, place your beef bean and cheese chimichanga over a bed of shredded lettuce, with rice and beans alongside. Alternatively, arrange all toppings in small bowls, allowing guests to customize their experience—a technique that preserves the chimichanga’s satisfying crunch.
Remember that visual contrast makes for appealing plates—the golden-brown chimichanga should remain the centerpiece, with colorful toppings and sides creating an appetizing frame around it.
Storage, reheating, and freezing tips
One advantage of making beef cheese chimichangas at home is that you can prepare them ahead of time, perfect for busy weeknights or entertaining. Mastering proper storage and reheating techniques ensures your chimichangas maintain their restaurant-quality taste even days later.
How to store leftovers
After enjoying your beef and cheese chimichangas, promptly cool any leftovers to room temperature. Afterward, place them in airtight containers or wrap tightly in aluminum foil to prevent moisture loss and bacterial contamination. Properly stored chimichangas remain fresh in the refrigerator for 3-4 days. For optimal quality, consider separating individual chimichangas with parchment paper or foil to prevent sticking.
Reheating methods that keep them crispy
Nothing ruins a beef bean and cheese chimichanga faster than soggy reheating. Fortunately, several methods can restore that coveted crispiness:
Oven method: Preheat to 350-400°F and place chimichangas on a baking rack over a sheet pan. Bake for 15-20 minutes if refrigerated or 25-30 minutes if frozen. Remove foil during the last 5 minutes for extra crispness.
Air fryer: My personal favorite method! Set to 375°F and air fry for 5-6 minutes, flipping halfway through. For frozen chimichangas, increase time to 8-10 minutes.
Stovetop: Heat a skillet with a small amount of oil over medium heat. Fry each side for 3-5 minutes until crispy. Cover if fillings seem dry.
Microwave: As a last resort, wrap in a damp paper towel and microwave for 1-2 minutes, allowing to sit for another minute afterward. Follow with a quick pan-fry to restore crispness.
Freezing instructions for make-ahead meals
Beef and cheese chimichanga recipes are excellent candidates for freezing. For uncooked chimichangas, wrap each individually in plastic wrap followed by aluminum foil. Alternatively, freeze them solid on a cookie sheet before transferring to freezer bags. Label with the date and cooking instructions.
Frozen chimichangas remain quality-safe for 2-3 months, though some sources suggest up to 6 months. When ready to enjoy, you can bake directly from frozen at 400°F for 30-35 minutes or thaw overnight in the refrigerator first for faster cooking time of about 30 minutes.
Conclusion
Making restaurant-style beef cheese chimichangas at home truly brings the authentic Mexican-American dining experience to your kitchen. Throughout this guide, we’ve walked through everything from the crispy exterior that distinguishes chimichangas from burritos to the various cooking methods that suit different preferences.
Most importantly, homemade chimichangas offer incredible versatility. You can customize fillings based on your family’s tastes or what’s available in your pantry. Additionally, the ability to choose between deep-frying, baking, or air frying allows you to balance authenticity with health considerations.
My family particularly enjoys our weekly “chimichanga bar” where everyone builds their own creation. This interactive dining experience transforms an ordinary weeknight dinner into something special. The kids love adding extra cheese while my partner piles on the jalapeños!
The storage and make-ahead options make these beef-filled delights practical for busy households. Undoubtedly, freezing uncooked chimichangas ensures you’re never more than 30 minutes away from a restaurant-quality meal at home.
Before trying your first homemade chimichanga, remember that practice makes perfect—especially when it comes to the folding technique. Your first attempt might not look Instagram-worthy, but the flavors will certainly impress. Last week, despite my less-than-perfect folding job, my guests still raved about the taste!
After all, nothing beats biting through that perfectly crispy shell to reach the savory, cheesy beef filling inside. The combination of textures and flavors makes every bite worth the effort.
Next time you’re craving Mexican food, skip the takeout and try these homemade beef cheese chimichangas instead. Your wallet will thank you, and your taste buds might never want to go back to restaurant versions again!
FAQs
Q1. What are the essential ingredients for a beef chimichanga? A typical beef chimichanga includes ground beef, refried beans, cheese, and spices like chili powder and cumin. Additional ingredients may include rice, onions, and tomato sauce. The filling is wrapped in a flour tortilla before frying.
Q2. How does a chimichanga differ from a burrito? The main difference is that chimichangas are deep-fried, while burritos are not. This gives chimichangas a crispy exterior. Chimichangas are usually served on a plate with toppings, whereas burritos are often wrapped in foil and eaten by hand.
Q3. Can chimichangas be prepared without deep-frying? Yes, while traditionally deep-fried, chimichangas can also be baked or air-fried for a healthier option. Baking at 400°F for about 25 minutes or air-frying at 375-400°F for 8-10 minutes can achieve a crispy exterior with less oil.
Q4. What are some popular toppings for chimichangas? Common toppings include guacamole, sour cream, shredded lettuce, pico de gallo, and additional cheese. For added heat, you can include jalapeños or hot sauce. These toppings enhance flavor and provide a contrast to the crispy exterior.
Q5. How long can I store leftover chimichangas? Properly stored in airtight containers or wrapped tightly in aluminum foil, leftover chimichangas can be kept in the refrigerator for 3-4 days. For longer storage, they can be frozen for up to 2-3 months, maintaining their quality when reheated.